I often get send documents that appear to be messed up with the images. Sometimes they cut over the text, sometimes they are simply in the wrong place. So the question is; how can I lock my images in Word, so they don’t move around the document at all?
In Word, there are a number of different solutions that you can use to lock your images in place. In this post, I’ll go through the best options so you’ll be fully informed and can choose the one that best suits your needs.
| Method | Best used for |
|---|---|
| Restrict Editing | Sending a complete document to others for them to view but no more. |
| Watermark | Having an image behind the entire document. |
| Picture Position Anchor | Keeping arrangement of page whilst continuing to work on document. |
| Picture Content Control | Blocking deleting image. |
| Fill Effects | Cover the entire screen and work on a canvas. |
| Header and Footer | Locking logos in place in a document for certificates etc. |
| Save as pdf | Sending a finished document |
Restricting Editing on the Document
In this method you are not going to just be locking the images in place. You are actually locking the entire document. Here is how you do it. This post isn’t going to go through how to move images
- On the review tab in the ribbon, click Restrict Editing:

- You will see the following screen:
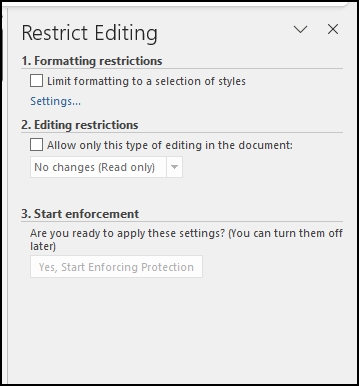
- In order to secure the images and lock the document check the Editing restrictions sections (2) and then select Start enforcement:
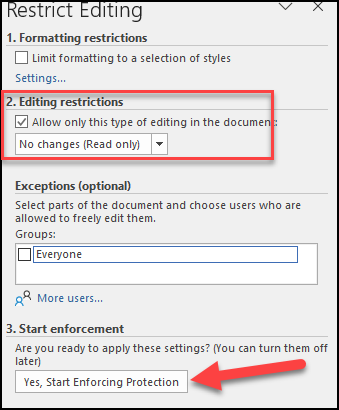
- You are presented with a pop up where you can put a password on the document to allow those with it to be able to edit the document:

That’s it. You have locked the images in place inside your document.
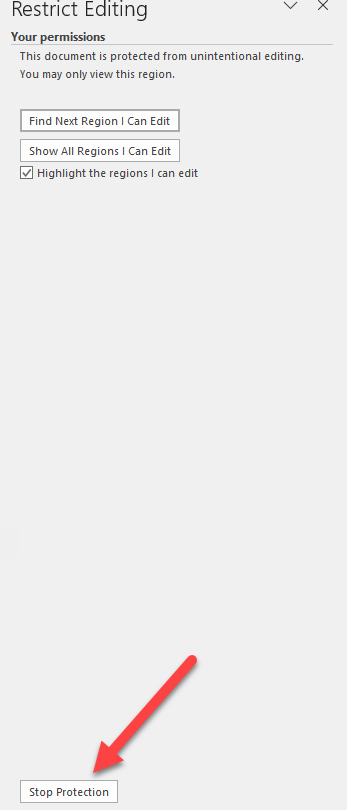
When you open the document again, you will see that all the options across the ribbon are grayed out. The reason for this is that the document is actually locked for editing. In order to unlock it you can put your cursor on the document and try to type. A sidebar should open up where you can unlock the document. If it doesn’t then, go to the review tab in the ribbon and click on the Restrict Editing button again.
Click on the Stop Protection button at the bottom of the sidebar, put in the password, and your document is now editable again.
Using a Watermark to Lock the Image on the Document
If you want a specific image in the center of your page than you can use the Watermark function on word to achieve this. Please note that this only works if you want an image in the center of the page. You cannot move the image at any time. For example, if you want to set it as an image at a specific place on your document you have to consider that it is there as an image without any nudging. It’s stuck and there is nothing you can do about moving it. If you want to move it, you’ll have to edit the image itself and then reinsert it.
For this reason it’s not a method that I recommend. However, be that as it may, here is the method:
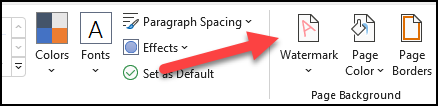
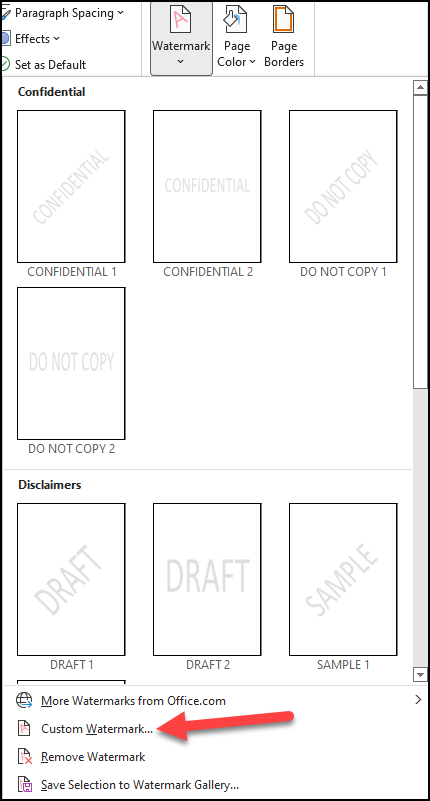
- On the Design tab of the ribbon, click on the Watermark button:
- Select the Custom Watermark option at the bottom of the window.
- Click the Select Picture button and then add the image that you want to add:
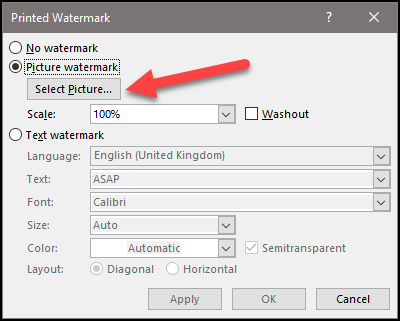
- After you have done this the image appears behind the text and cannot be moved.
As I’ve mentioned already, this isn’t the best way to lock an image in word as you have very little ability to put the image where you actually want it to go.
Picture Position Anchor
This method is actually the easiest way to lock images in word. However, it’s not as permanent as some of the other methods. What you are going to be doing with this method is editing or adding to your text whilst keeping the current arrangement of the image.
- Insert your image onto the page.
- Click on the image in your document. You should see a small button appear on the top right-hand corner of the image:
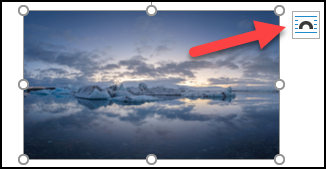
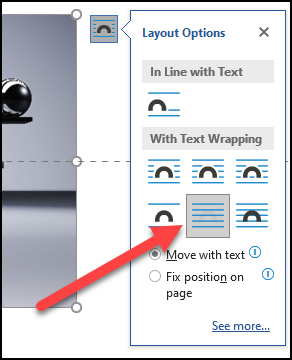
- To understand exactly what each of the options does, check out that specific post where I deal with that. However, for this, you have to select any of them as long as you DON’T select in line with text:
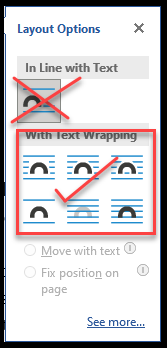
- Once you have selected the style that you want, the two options at the bottom of the pop-up menu change to black so that you can select them. You want to select the Fix position of page option?
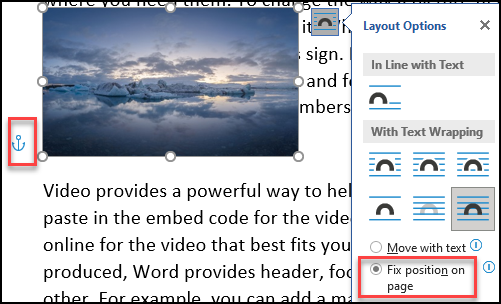
- What you see now is that there is an anchor icon on the side of the image. This has locked the image in place to that specific paragraph and placement.
Be aware that it might allow you to add a line of text, and this will move the image. However, this is for one line and one line only.
Picture Content Control
This method sort of locks the image in place. Once it’s there you can’t move it around with a mouse. However, by pressing enter, typing or erasing the image does get moved.
This method is therefore only good if you want the image locked once you have completed the document. If you are planning on editing it at any time, I would give this one a miss:
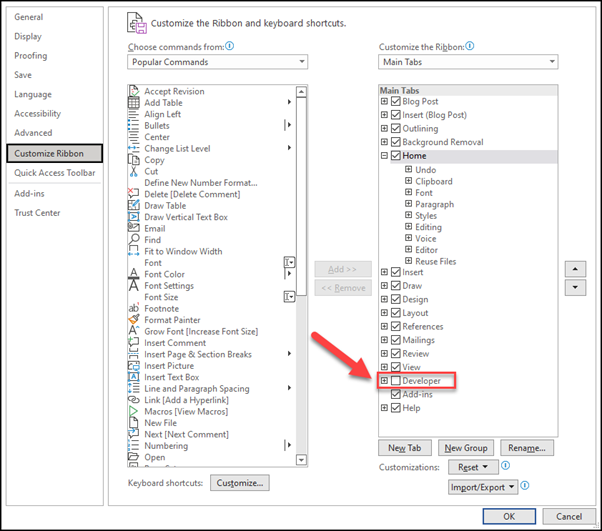
- Click the File menu on the ribbon and select options at the bottom of the screen:

- Click on Customize Ribbon and then on Developer.
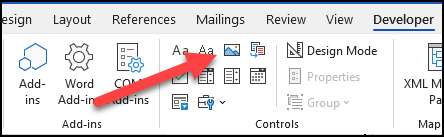
- You will see the developer tab appear in the ribbon:
- There is a little button called Picture Content Control. Click this button:
- An image holder appears where you left the curser:

- Click on the button in the center of the box that has just been created to add a picture:
- Select the image file that you want to add.
You have added an image with the Picture Content Control!
Lock Image Using Fill Effects
If you want to have an image in the background of your document then you can use this method. It locks the image in place and essentially creates a canvas for you to work on.
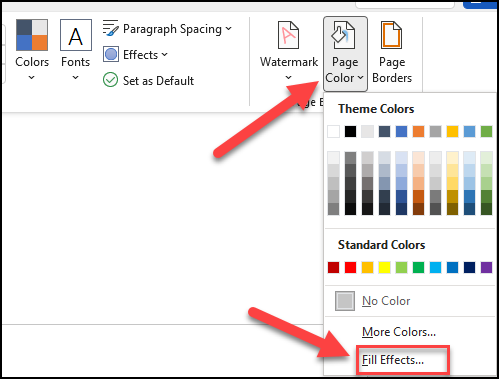
- On the Design tab of the ribbon click on the Page Color button and then on Fill Effects:
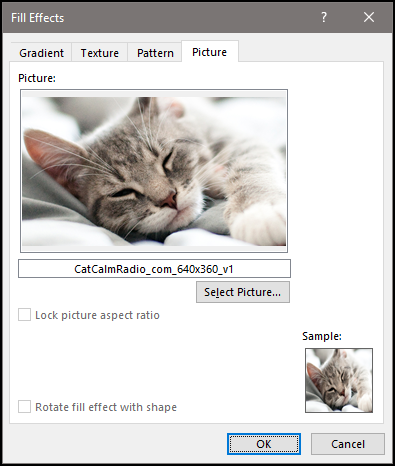
- On the pop up window, select the Picture tab:
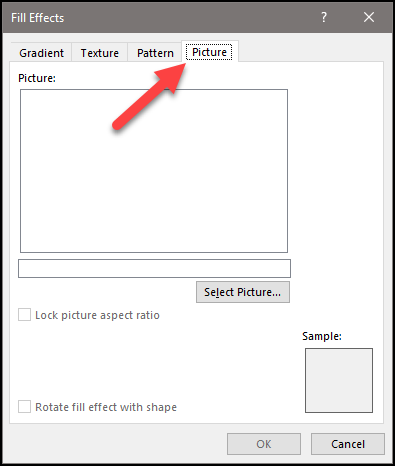
- Choose the picture that you want to add with the Select Picture add:
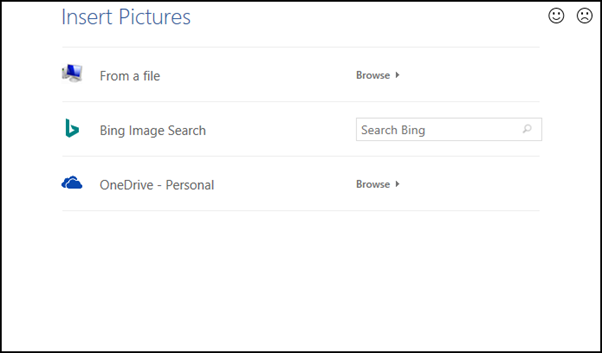
- If you are searching for an image, type what you want inside the Bing Image Search and press enter.
- Once you have chosen your image click on insert:
- And your image will be displayed on the screen:
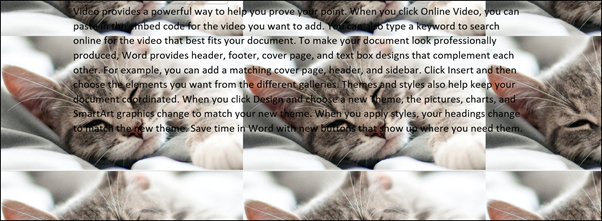
Yes, not the most pretty way of doing things but it does work.
Header and Footer
This method is best used for official documents, certifications, logos, and the like.
Bear in mind that since you are adding the image to a header or footer of the page it will appear in all pages in the document. Therefore this method is great for single certificates but not so for a document with more than one image.
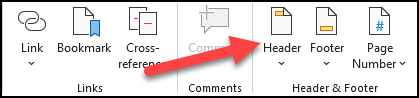
- Open the header or footer section of your document. You can either do this by double clicking at the top of the page or clicking on it in the Insert menu on the ribbon:
- You can select any of the drop down options as we will be removing them anyway.
- On the new Header & Footer tab that has appeared in the ribbon, click on the Pictures button:

- You will see the picture that you have selected appears in the header. However, this isn’t what we want here. You might think that it’s stuck in the header. This isn’t true.
- Click on the picture and then on the Layout Options. Select the Behind Text option:
- Now you can drag it around the page wherever you want. This is true even if you drag it to where you wouldn’t think the header and footer are.
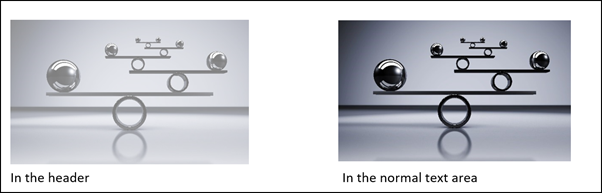
- Once you double click anywhere else on the page, you will exit the header and footer section of it. The image will go slightly gray. See the difference between the two images, one in the header and the other in the normal section of the page:
Save as pdf: A Different Method but Perhaps One That You Are Actually After
If you are sending your document and just need to ensure that the receiver gets it in the way you intended the best method of all is just to save it as a pdf.
- In order to do so, go to Save as and top section click on More options:

- In the pop up box, in the Save as type drop down, select save as pdf:
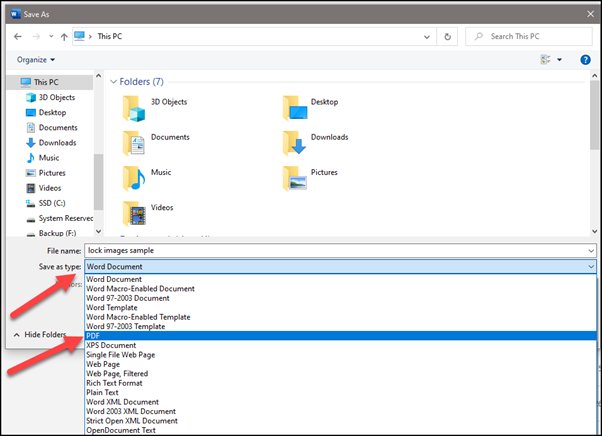
- This creates a new pdf document that I’m sure you know, can’t really be modified.
In Summary
Knowing how to lock images in Word is an important skill to know and perfect if you are going to be using Word a lot. Although there are quite a few different options when it comes to locking images, there are two that stand out to me.
For certifications and one-word documents where you just need the image exactly where you want it, I recommend using the header and footer method.
For everything else, as long as you want to continue working on the document, I recommend using the picture position anchor method. These I feel are the easiest to use and most customizable.
If you have to send a document though, I recommend sending it as a pdf or just locking the document so no one can edit it without the password.
I hope you have enjoyed this post and as always, if you have any comments, please leave them below and I’ll try to answer them as soon as I can. Till then, good luck!