Text Boxes in Microsoft word document are great for adding emphasis to things, adding text to images and helping navigate through a document. Here we will learn how to add a text box, how to move a text box, and the different options that are available to you to get the text to act the way you want it to.
What Is a Text Box in Word?
A text box is simply a box with text in it. You can use them as headers, paragraph titles for emphasis, sidebars, quotes, or any other reason that you feel is nice.
What’s nice about text boxes is that when you get good at them, you are not limited to boxes. You can add them to any shape, add color and move them around wherever you want.
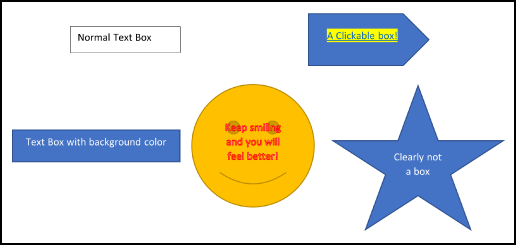
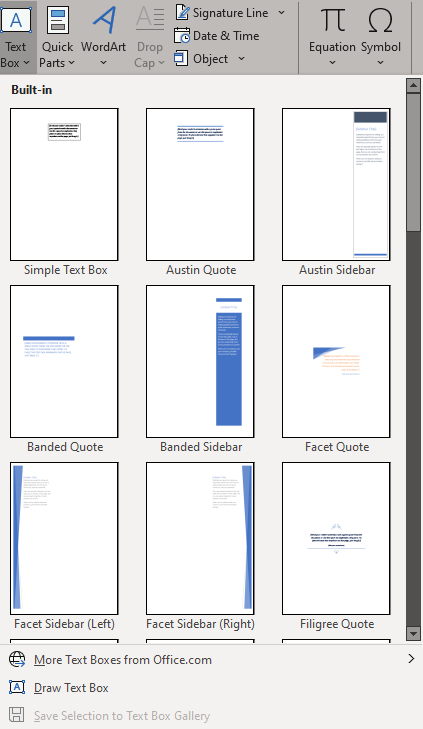
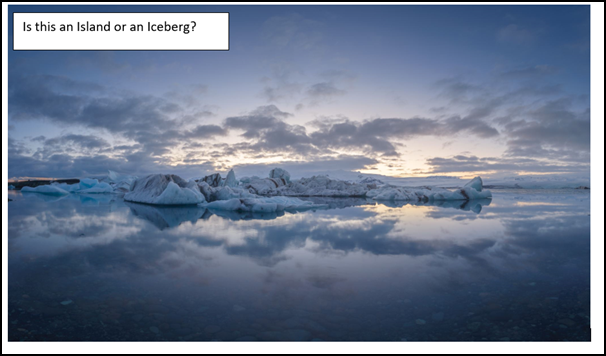
Have a look at these examples to see what I mean:
As you can see, there are loads of different types of text boxes and they can be used for whatever you want.
How to Add a Text Box?
In order to add a Text Box in Word do the following:
Adding a Text Box Method #1
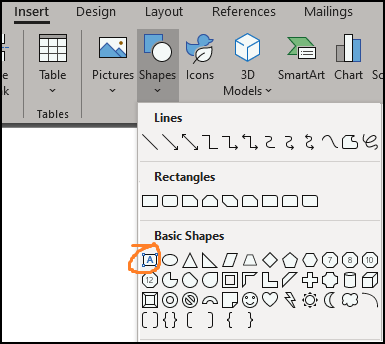
Navigate to the Insert Tab.
Select Shapes.
From the drop down menu select Text Box.
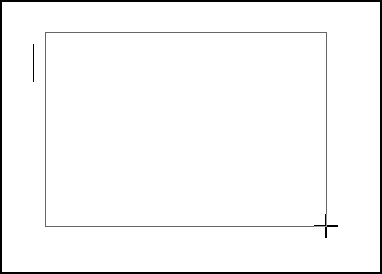
After you have clicked the button, your mouse curser will change into a cross.
Click and hold your mouse to decide the size of your box. Don’t worry, you can always change it after you have added it.
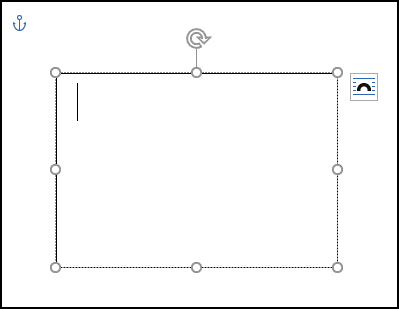
Type whatever you want inside the box.
Hey presto! You have a text box in your document
Adding a Text Box Method #2
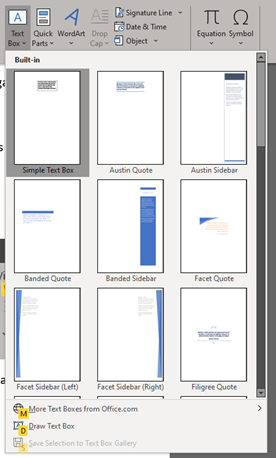
Still on the Insert tab, click on the Text Box button.
You will see that there are a few different options to choose from.
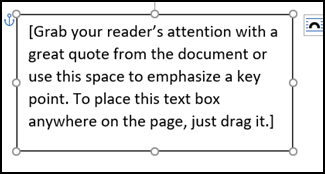
After clicking the one that you want, it will insert onto the page. In this instance, I have selected the simple text box option.
If you want, you can select the Draw Text Box option and you will get the crosshairs again so you will be able to select the size of the box you want to begin with.
Adding a Text Box Method #3
Of course, it’s always useful to know to keyboard shortcut for adding a text box. In this case use the following:
Press and then release the ALT key.
You will see a bunch of letters appear on the ribbon.
Each of these letter correspond to a different command. You can actually find a keyboard shortcut for almost anything in Word if you want to experiment enough.
Once you have released the ALT key do the following:
Type N and release. You will see the following:
Type X and release. You will see the Text Box options open:
Type D and release.
And you will see that the curser of the mouse has changed into the cross hairs again so you will be able to draw your text box.
How Do I Resize a Text Box?
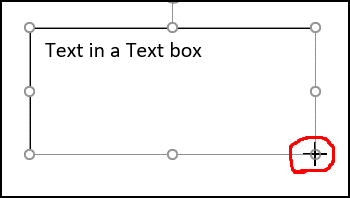
Obviously, once you have a text box, you will want the text to fit inside it. The easiest way to do so is to simply select it, go to one of the corners and resize it to your liking by pressing and holding the mouse button:
Here you can see that curser has been replaced by the crosshairs again so you can reshape the text box.
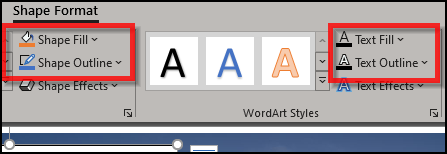
In fact, if you notice, there is actually a new menu in the ribbon that is just there for your text box:
There are loads of different options here that you can play around with including adding a fill, resizing, changing the colors, positioning and more.
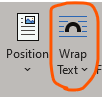
How Do I Move a Text Box in Word?
Depending on which method you used to insert the text box determines which the default placement setting of it is. As you can see on the Shape Format menu, there is a button called Wrap Text:
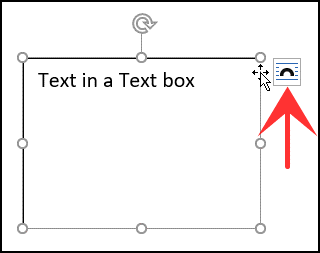
Clicking on this gives you a few different options on how you want the text box to appear.
The other method of accessing this menu is to click on the text box and then select the Wrap text button:
Let’s go through the different options so you can see what they each do:
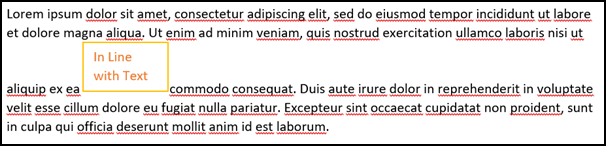
In Line with Text: What this means is that the text box will be part of the text. Just like this sentence that you are reading, so too will the text box be. It’s important to note that this means that the text will be in line—and therefore the previous line of the text will be shifted up to accommodate this. When it is In Line with Text it acts as a part of text. You cannot just put it where you want. When you go to move it, you will see a regular curser and line showing you where it will appear in the text.
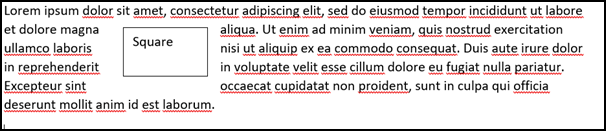
Square: In this situation you can move the text box wherever you want and it will not be limited to the text. It will always be part of the text but not over it. In a sense, you create a square where the box will fit in. It goes through multiple lines as opposed to just a single one.
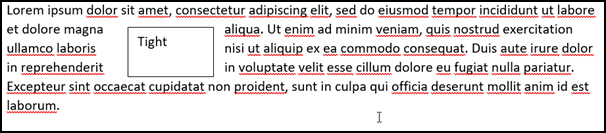
Tight: This mode is very similar to square. The only difference being the margins on the side of the text box. The image above (for square) and below (tight) are exactly the same apart from this difference.
Through: The difference here is not noticeable at first. In fact, you can only notice it if you use a different type of shape. Whereas the text in the “Tight” setting will never be inside the text box, in Through it will even go into the box. However, I don’t really want to get into this as it’s a topic for another time.
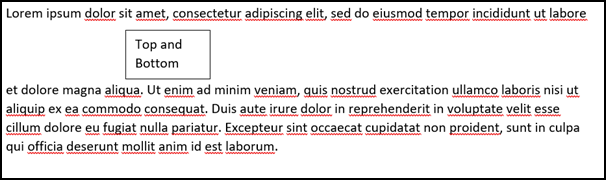
Top and Bottom: In this situation the text box takes up the whole line and there will be no text at all apart from in the text box:
Behind Text: Here, the text box doesn’t actually take up any extra room. However, you will only see it behind the text. You are essentially hiding the box. This is good if you want to have zero margin and don’t want to play around with the other settings too much:
In Front of Text: In this setting, instead on the text box being behind, or part or the text, it sits right on top of the existing text:
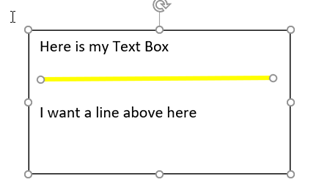
How Do I Add a Line in a Text Box?
This is one of the more popular questions and the answer is actually fairly simple:
First of all create the text box:
Now in this situation you want to add a line in between the two lines. So do the following:
Go to the Insert tab and click on Shapes.
Click on the line that you want to add. I’m going to add a straight yellow line.
Add the line inside the box wherever you want.
That should be it but it isn’t. If you want to move the box the line will not come with it. Therefore what you need to do is “group” the two items together so they will be joined. Wherever you move the box, the line will come with it.
Click and select the line.
Holding down Ctrl, left click the Text Box.
You will see that they are both selected.
Right click and select Group.
This will group both “objects” together.
That’s how you add a line in a Text Box!
How Do I Insert a Text Box in a Picture?
As we saw in some of the examples above, knowing how to insert a text box inside a picture or image is an important skill. The same method will be used for an object or shape where you are not starting out from creating a text box.
Whereas when you create a text box and then adding color to it is pretty standard, adding text to an image is slightly more difficult. But don’t worry, I’m here to show you how to do it. There are two different scenarios and I’ll deal with both of them:
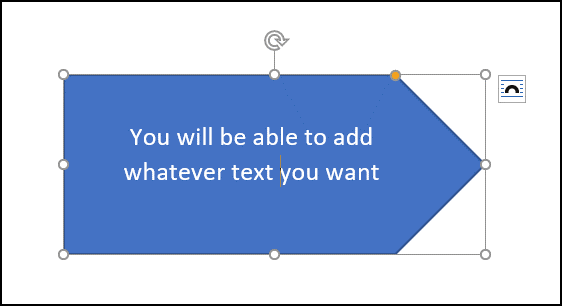
How to Insert Text into a Shape in Word
I’m just going to show you the easiest way here. Just follow these instructions:
Select the shape and right click.
On the pop-up menu select the Add Text option.
A curser appears and you are able to start typing straight away.
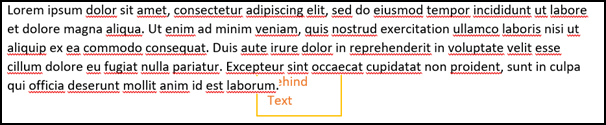
Adding Text inside an image slightly more complicated as this method will not work. What we need to do is to create a separate text box and then place it inside the image.
Steps to Insert a Text Box in a Picture:
Create a new text box and type the text that you want.
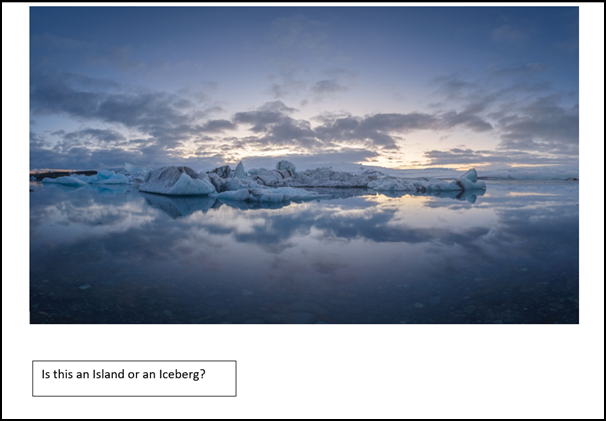
As you see, I have both an image and a Text box.
Drag the textbox to where you want the text to be. In this case I want it to be in the top left corner of the image.
Obviously, this isn’t looking great. What I want here is for the text to be white and everything else to disappear. Let’s take care of that.
Select the text box and navigate to the Shape Format menu on the ribbon.
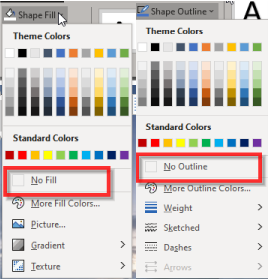
Select the text as you would do in any document and choose the desired color. I’m going to change the Text Fill and Text Outline to white.
This is how it looks right now as the background of the Text Box is also white. Nothing to worry about.
Change the Shape Fill and Shape Outline to No Fill and No Outline:
And hey presto. You have yourself some text inside your image:
How Do I Convert a Text Box to Text in Word?
In order to convert your Text Box to normal text all you have to do is:
Select the Text Box
Highlight/select the text
Copy it
Paste it wherever you want it.
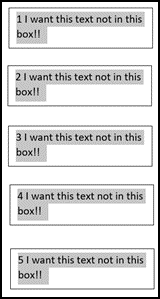
If you have a number of text boxes and you want to convert them all at once you are do the following:
Go to the first Text Box and highlight the text.
Go to the next one and, whilst pressing the Ctrl key on your keyboard, double click the text.
Continue doing this for all the text boxes you want.
Copy the text (whilst still holding down the Ctrl key, press C)
Paste the text.
All the text that was inside the boxes is now out.
Method #2
This method is better if you have lots of Text Boxes that you want to take the text out of. However, it’s a bit long winded and I don’t really recommend it:
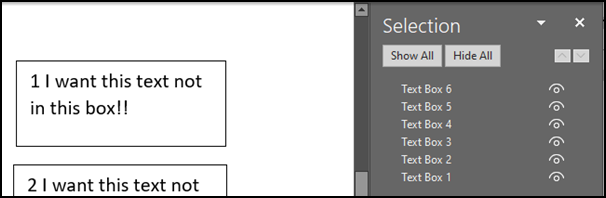
Click on Select and then Selection Pane.
You will see the selection pane on the right of the screen.
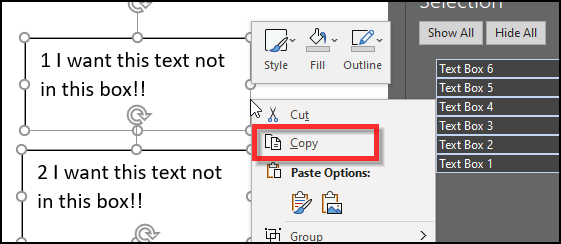
Click the Text Boxes that you want to select, WHILST holding down the Ctrl key.
Right click on any of the Text Boxes and select Copy.
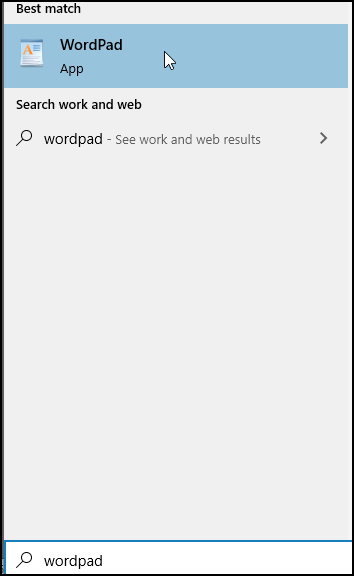
Go to the Start Menu and type in Wordpad to open up this program.
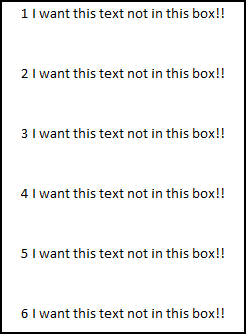
Click Paste and your text will appear on separate lines.
Copy that and then paste it back into your document.
Why Is There a Box around My Text in Word?
You will often find that there is a box around your Text Box. This is actually the default setting. However, you often will not want it there. In truth though, it does actually need to be there. It is after all a box. Therefore what you need to do is to simply make the outline go away. This is actually very easy and if you’ve read through till now I’m sure you can work it out. However, the simple instructions are below:
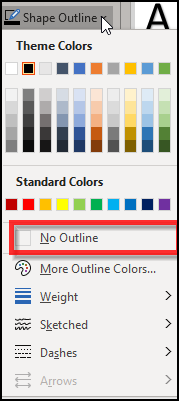
To Remove the Border of a Text Box:
Select the Text Box.
Navigate to the Shape Outline Button on the Shape Format menu.
Select No Outline.
And you will have removed the Box around your text.
The Last Word
Text Boxes in Word are incredibly versatile and can be used in so many different ways. Play around and you’ll be surprised what you can actually get them to do. I hope you have enjoyed this post. If you have any comments or questions, let me know and I’ll do my best to answer them for you.