There are many questions such as how to delete a footnote in word, how to insert endnotes in word, how to convert...
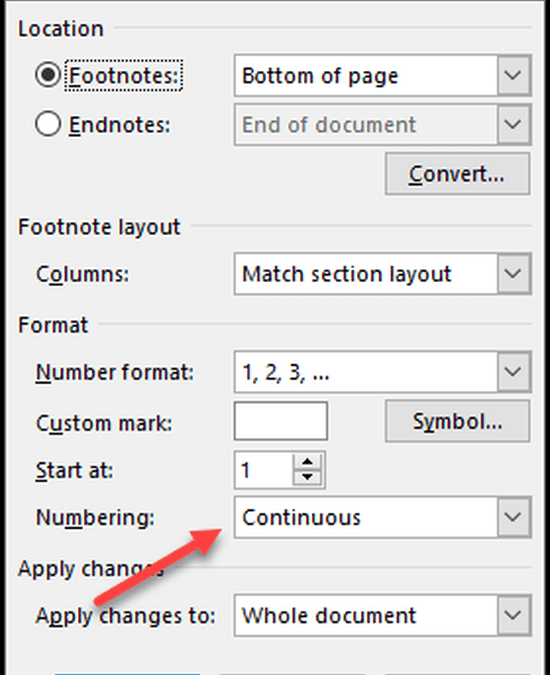
There are many questions such as how to delete a footnote in word, how to insert endnotes in word, how to convert...
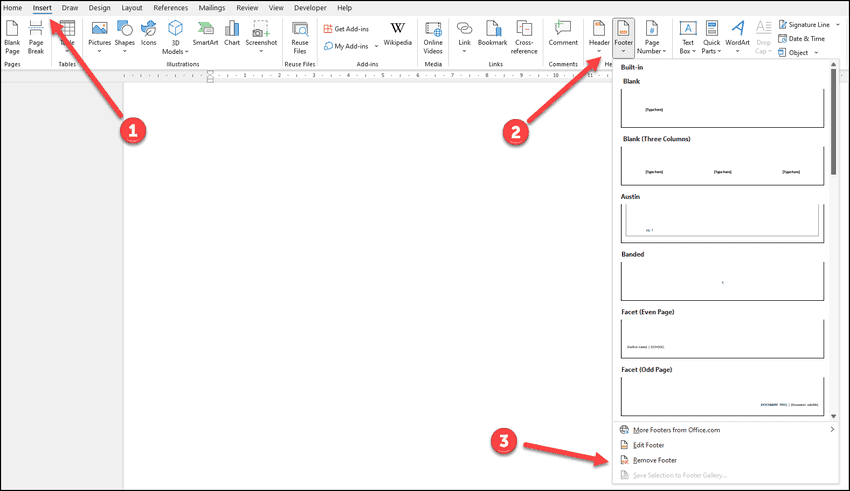
Do you have a footer or header in your document that you want to remove? Follow these easy steps to get it done...
If you ever copy text from a different source, you have probably faced having to remove the highlighting that comes...
If you have a lot of hyperlinks in your document and you want to remove them all in one fell swoop, there is a simple...
If you have a long list then you will have a whole lot of white space in your document. This makes it hard to read and...
Sometimes you just need one portion of your document to be landscape instead of portrait. Other times you may want...
If you are writing a letter, or for that matter, any other kind of document that you want dated, you need to know how...
You probably know that if you want to type in half, or three quarters, you can just do so and you will see that...
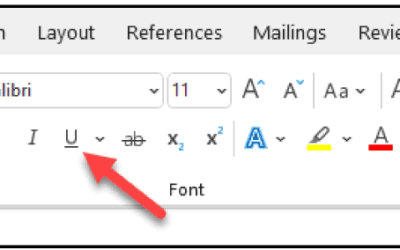
Knowing how to underline in word isn’t something I really thought that I would write a post about. After all, can’t...
Need to know how to line up text in word? Learn how to align your text so that it looks the way you want it to. There...
Sometimes you might get a document that’s locked for editing, and you need to edit it. It may be that you get the...

You may want to give your document some color. You may want to be able to rest your eyes and have a darker screen. You...