Knowing how to underline in word isn’t something I really thought that I would write a post about. After all, can’t you just simply highlight the text and either select the underline button or press Ctrl + U on your keyboard. The truth is that that is definitely the case. However, I’m going to show you some other cases where just using that method isn’t going to work. For example, if you want to have a number of lines for a form or something similar you are going to need to know a different way of adding underlines to your document. Keep reading to see how to do this:
Simple Underlining in Word
First things first, if you want to underline a specific word or sentence, the easiest thing to do it to simply highlight the text and then either press Ctrl + U or click on the underline button in the font section of the Home tab:

Underlining Just the Words
The default option in word is that when underlining you will be doing so for the entire length of the text that you have highlighted, including the spaces in between. Let’s say that you don’t want to do this though and just want to underline the words themselves and not the spaces. This is actually quite a nice effect that you can use. Here is how you do it:
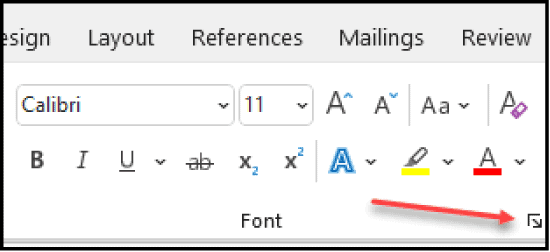
- On the Font menu, click on the little arrow on the bottom right of the box:
- The Font pop up box appears.
- There, you will see a section called Underline style:
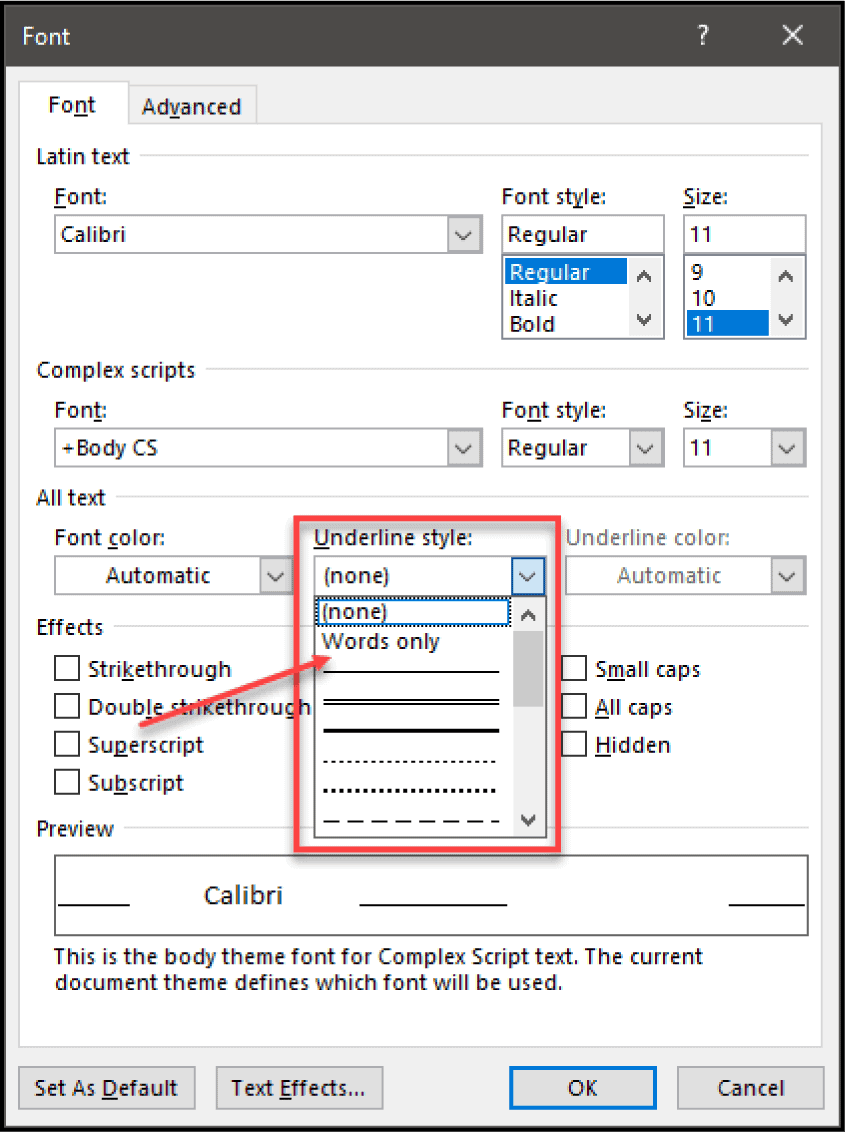
- Select the option named Words only. This will now only underline the words and not the spaces in between:

How to Double Underline in Word, How to Change Underline Color and Other assorted Styling Options
The above is just one way you can style your underline. There are many more options that you can choose from including different colors and styles such as a double underline, dashes and many more.
In order to see the different styles you can use the above method if you wish. However, there is a more simple method by using the drop down menu that is situated by the underline button in the ribbon. After, you have highlighted the text that you want to be underlined, click on the arrow button below the underline button and you will see a few different options:
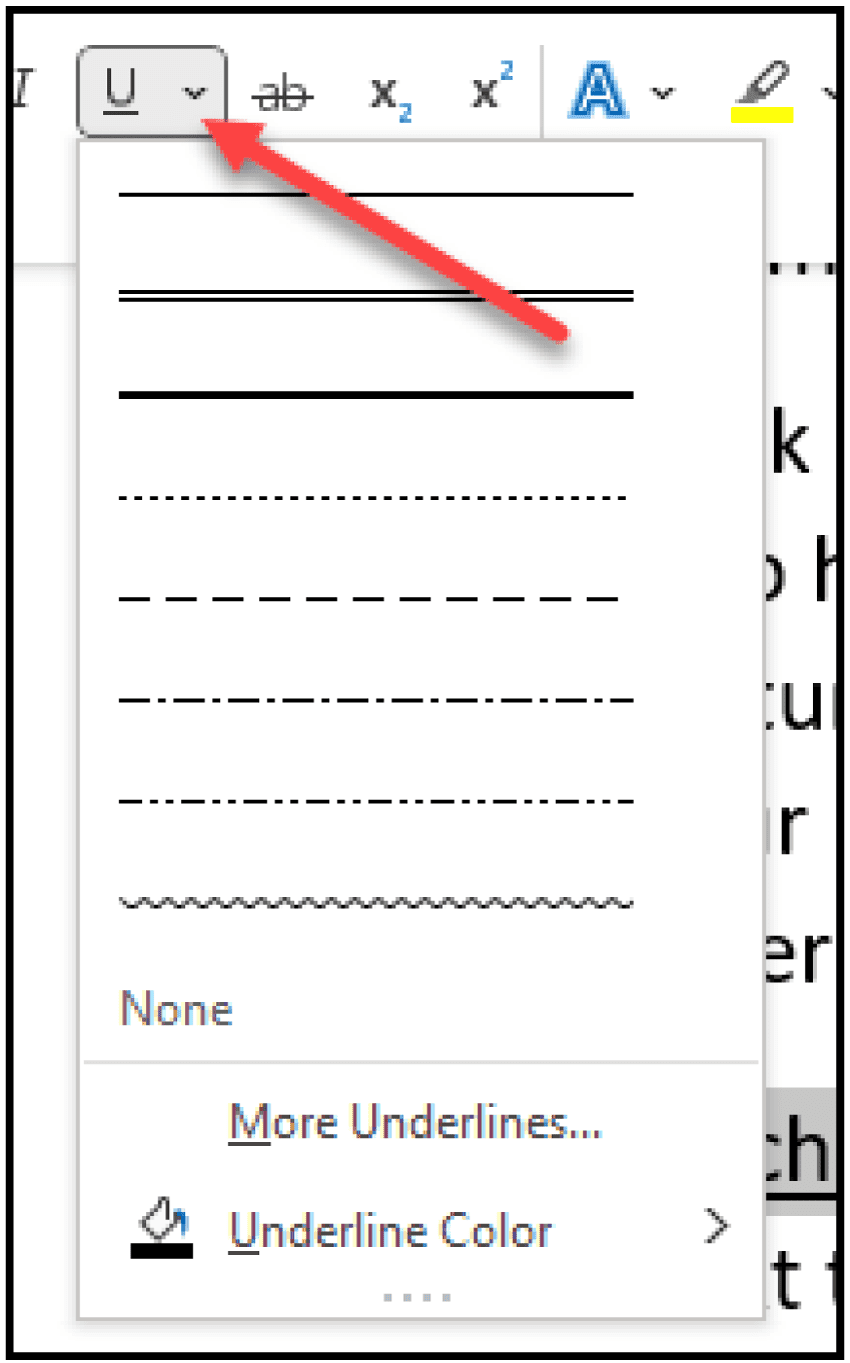
You can mouse over the different options there in order to see how they look underr the highlighted text. There are more options that you can access with the More Underlines option on this menu. As well as this, you can change the color to whatever you like.
How to Make an Underline in Word Without Text – Table Method
This may all be easy to you up to this point, however, if you want to know how to underline in Word with a whole line without any text the above methods will simple not work. Therefore I’m going to go through a few different methods on how to add whole lines to your document.
You can insert a line or number of lines to your document with a table. This is the best method if you want to add more than one line. You can use this method to learn how to make an underline in word that you can type over as well so you get a gauge of how much space you have left on the line.
To do so follow these steps:
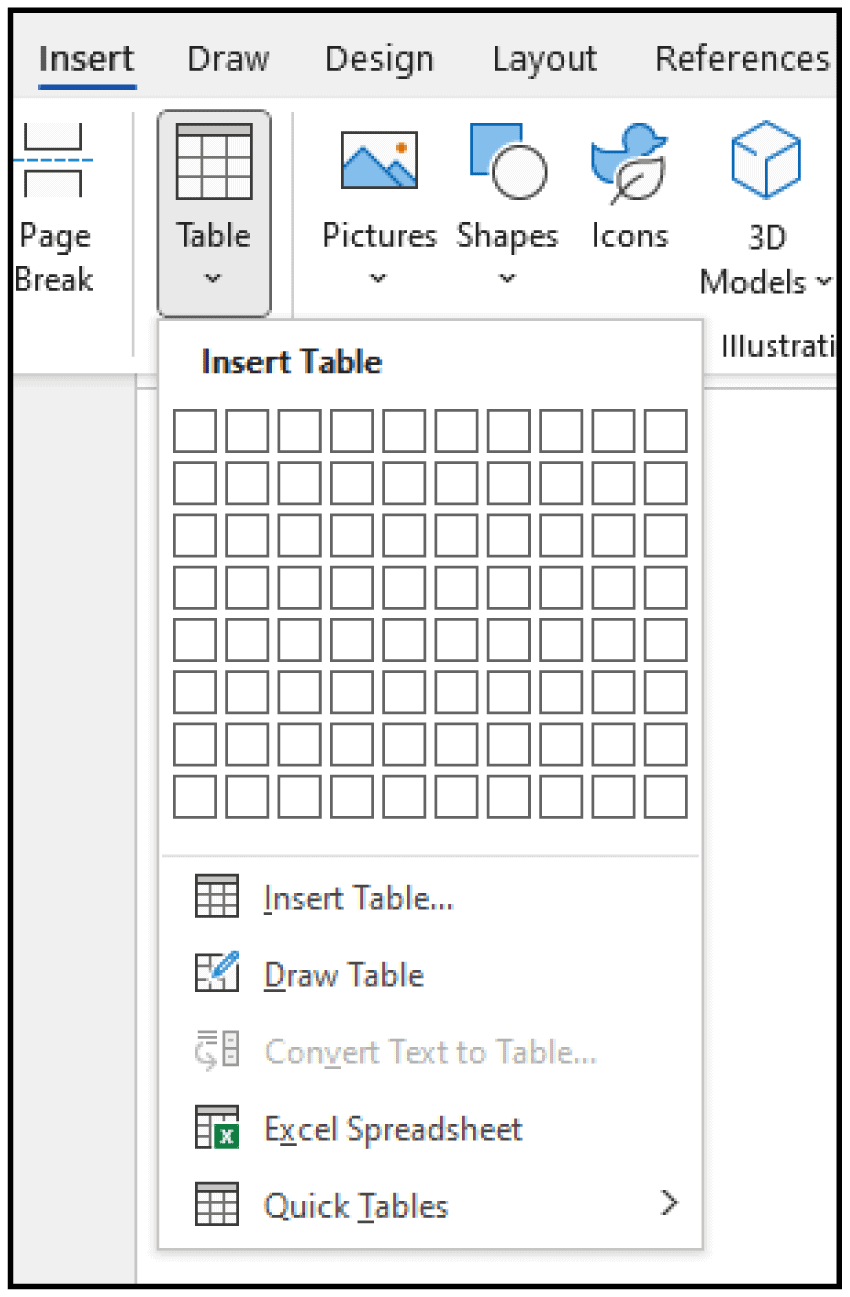
- On the Insert tab in the ribbon, select Table and then add the required number of lines that you want. If you need 2 then add a 1 x 1 table, 3 then 2 x 1 and so on. If you require just one line then add a 1 x 1 table as well. We will edit it to ensure it comes out the way you want:
- Let’s say that in this situation I only want to add one line. Therefore I need to remove the side lines and either the top or the bottom line. In order to do this we use the borders options.
- If your curser is in the table you will be able to see the Table Design tab in the ribbon. At the end of the tab you can see the Borders button. Click on this:
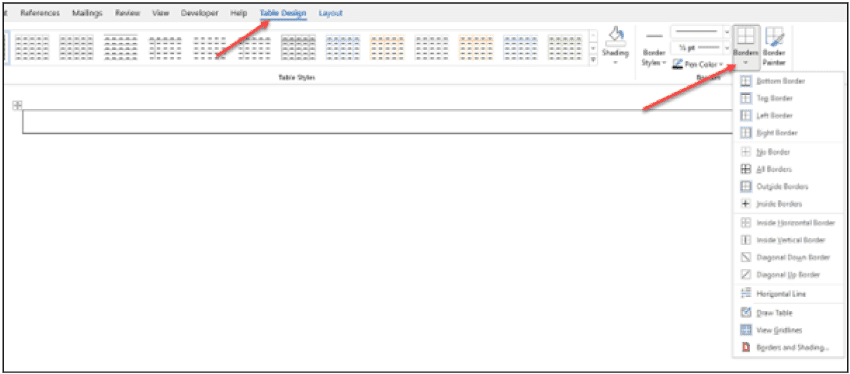
- Let’s remove the Bottom, Left, and Right Border by clicking on each of them. This will leave us a nice line in the document:

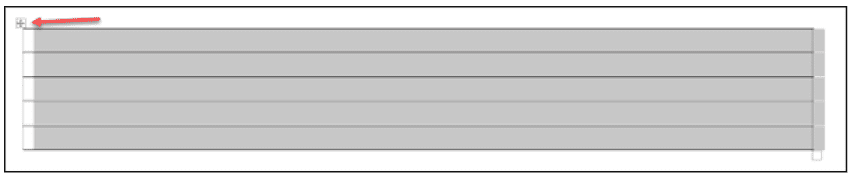
- As you can see, there is just one single line left. Be aware that since it is a table, the other borders are visible to you. They will not be printed, they are just there as a guide telling you the size of the cell that you have created with this table.
If you want a complete rundown on how to use tables, please check out the dedicated post that I wrote about them.
Editing the Line Height of the Underline
If you want to add a number of lines, I would definitely recommend that you use the table option. You will gain a variety of different options and don’t have to edit each line but rather, the entire table at once will be changed.
If you want to increase the height of the lines, for example if your typed document is small but you want to give people the option to write in after it is printed then you don’t want the line height to be the same as the rest of the document. In order to increase the line height follow these steps:
- Add the table as before, I’m just going to have 6 lines, therefore a 1 x 5 table.
- After this I’m going to remove the left and right borders but keep the top and bottom ones. As well as this, I need the lines in the middle so I’m going to select the Inside Borders option as well. This leaves me with the following:

- There are two ways to change the line height. The first option is not as exact as the second but is slightly easier. Neither of them are hard though.
Option #1
- Highlight the table by clicking on the little box on the top left of the table:
- On the Home tab in the Ribbon, click on the Line and Paragraph Spacing button and select the option that suits you:
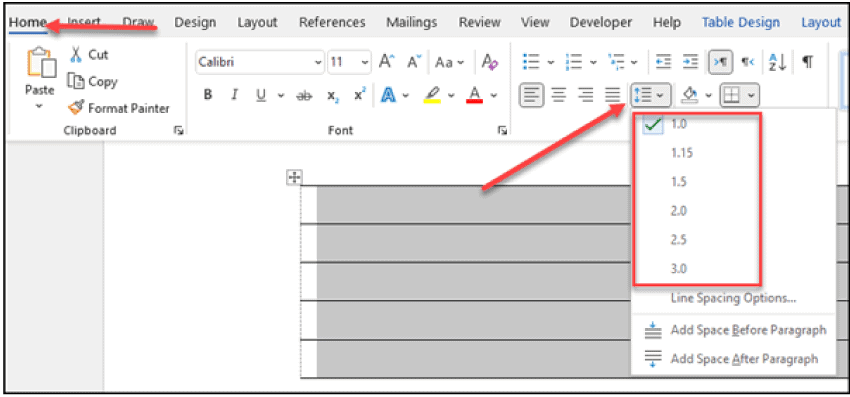
- You can cycle through them to see what you like.
Option #2
- On the Layout tab in the Ribbon that is relevant to the table (ensure you have your curser in the table to make it appear. This isn’t the normal Layout menu) enter the height that you want in the Cell Size field.
- After this, you will see the size of the cells increasing according to your desired measurement:
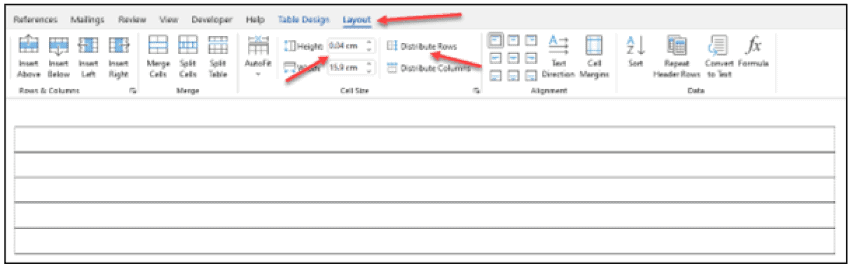
- If you haven’t selected all the cells in the table you will only see one cell increasing in size. In order to fix this, click on the Distribute Rows button afterwards and you will see that they all have the same height.
How to Insert Underline in Word – Use Underscore
A further way of adding an underline to your document is by simply using the underscore button on your keyboard. Although every keyboard is different, it’s generally the button after the zero. Press Shift and the button in order to access it. It’s not especially pretty but it does work.
Underlining with Three Dashes
A quick and easy way to add an underline to your document is to simply type in three dashes at the beginning of a line and then press Enter. — Really, it works!
How to Make Underline in Word Without Text – Inserting a Shape
The last method that I’m going to show you is by adding a shape.
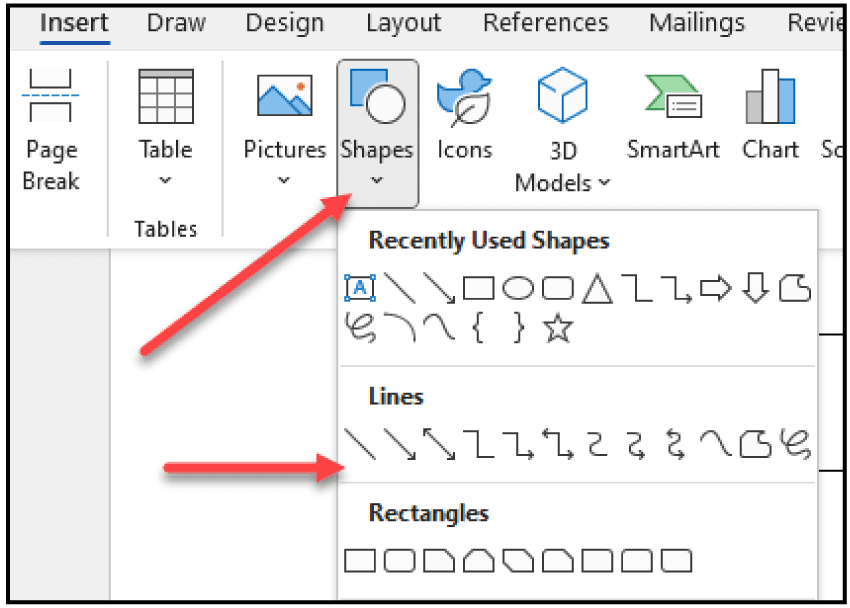
- On the Insert tab in the Ribbon, click on Shapes and then on Lines to select the line that you want:
- Hold Shift to ensure you get a straight line and click and drag your line across the page.
- You can edit the shape any way you like by using the Shape format menu that has appeared in the Ribbon. For more information about that particular menu, please check out my post on how to deal and work with images.
In Summary
I’ve gone through a variety of different methods showing you how to underline in Word. From the very basic to some more advanced methods. You should be able to now double underline, adding color, as well as use tables to get a nice, crisp feel to your lines. I hope you enjoyed this post and, as always, if you have any questions or comments, feel free to leave them below. Good luck!