If you are writing a letter, or for that matter, any other kind of document that you want dated, you need to know how to insert the date in Word. Although of course you can simply type it in, is there a way of doing so via word that can even auto update when you want. In this post, I’m going to go through how to insert date, ensure that it automatically updates, and even insert a date picker if you so want.
How to Insert Current Date in Word
In order to insert the current date in word do the following:
- Click on the Insert tab on the Ribbon and then select Date and Time:

- On the pop up dialog box, select the type of date you would like in your document:
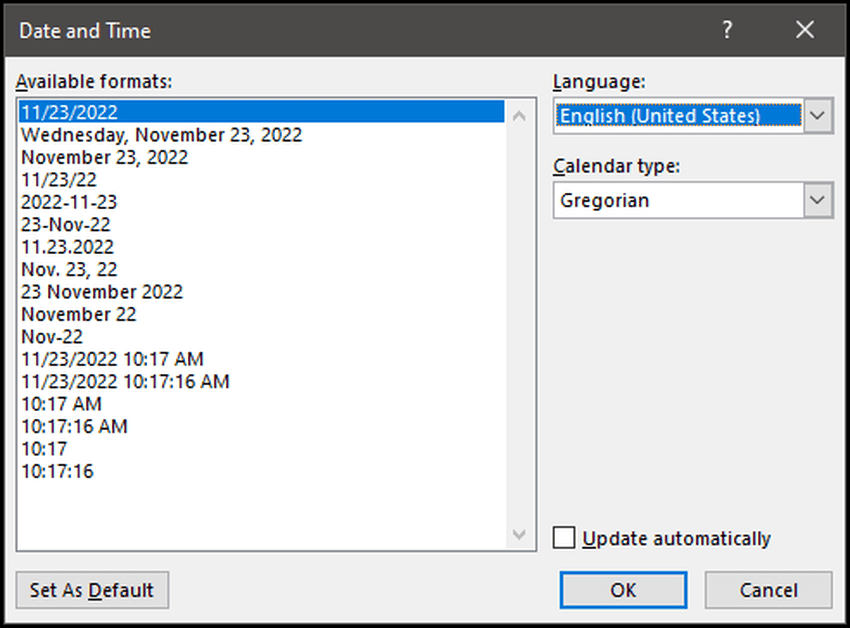
- As you can see there are quite a few different options. For the purpose of this walkthrough I’m going to select the top one.
- Click OK and the date has been added to your document wherever the mouse is.
How to Insert Date and Time in Word
If you want to insert both the date and time in word, you can probably guess by now how to do so. Simply select the option that also contains the time using the instructions above.
How to Insert Date that Automatically Updates in Word
That’s all very well if you want to have a static date that will never change. However, if you want to ensure that that whenever you have to use the document that the date is updated automatically, this is going to be tricky. And that’s why Microsoft have a little checkbox that you can use to ensure that when you insert a date into your document, it will automatically update:
Simply click on the Update automatically checkbox:
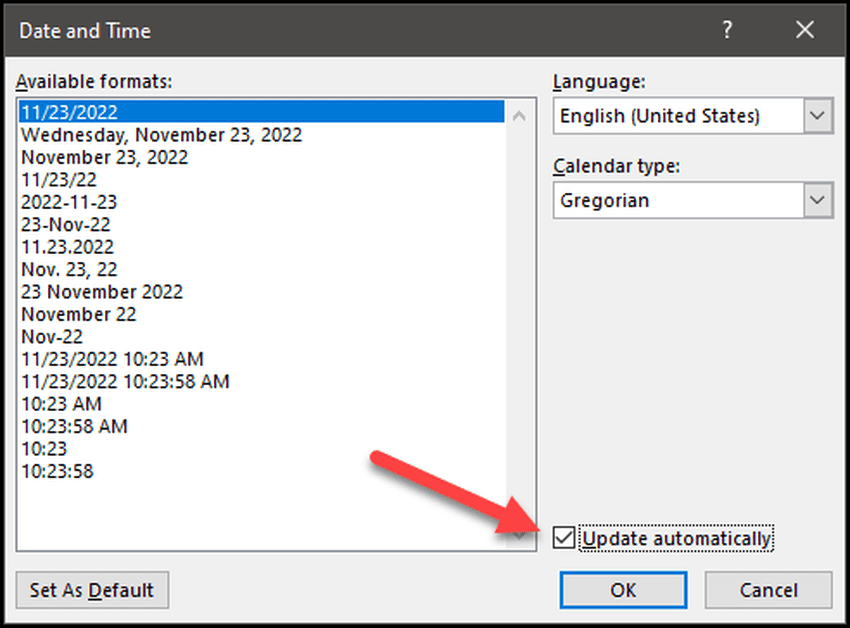
Now, when the date is displayed in your document, the end user will not see the difference. However, if you click it, you will see that a small box now contains the date:
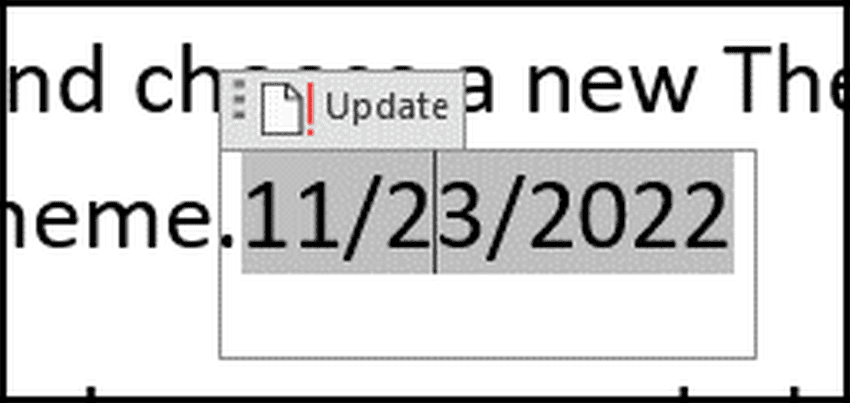
If I change the date to whatever I want and then click on the Update button, the date will automatically update. The same is true when I’m inserting a date with a time. The time will automically update with a click of the button. Not only this, but whenever you reopen the doucment on a different day the date will have automatically changed.
Shortcut for Inserting Date in Word
Of course, it may just be quicker and easier to type in the date you want. However, if you want an automatic updating date you definitely want to ensure that you get it otherwise you will be constantly having to redo the date. So a shortcut would be great. And here it is:
Alt + Shift + D
The date will be automatically inserted into your document.
How to Change the Appearance of the Date in Word
It’s all very well if you are happy with the way it looks, however, if you want to change it, perhaps add the time, have a long date instead of a short one or vice versa, how do you go about doing it.
Simply do the following:
- On the date that you have inserted, right click it to bring up the pop-up menu and then select the Edit Field option. If you don’t see it the first time, just right click a second time. Don’t be nervous that it won’t appear. It will.
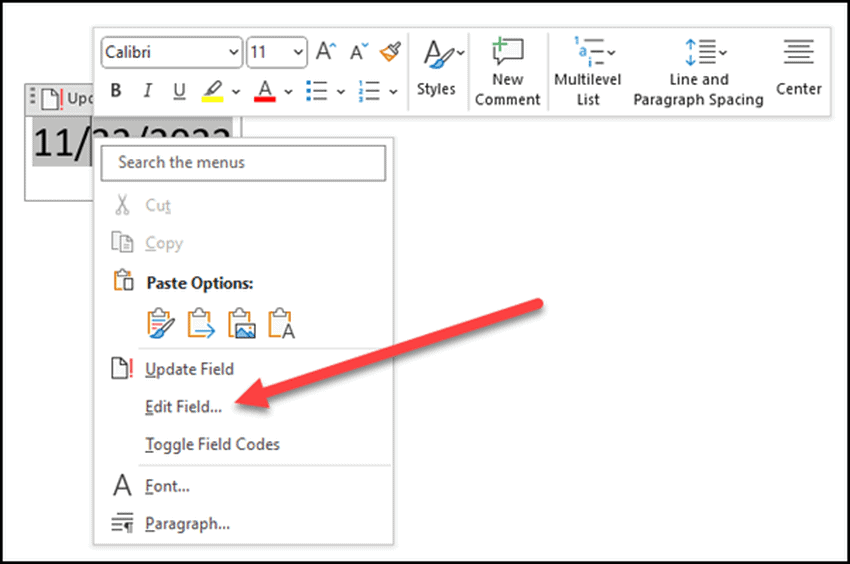
- On the pop-up dialog box, select the different type of date that you want to display and then click on OK.
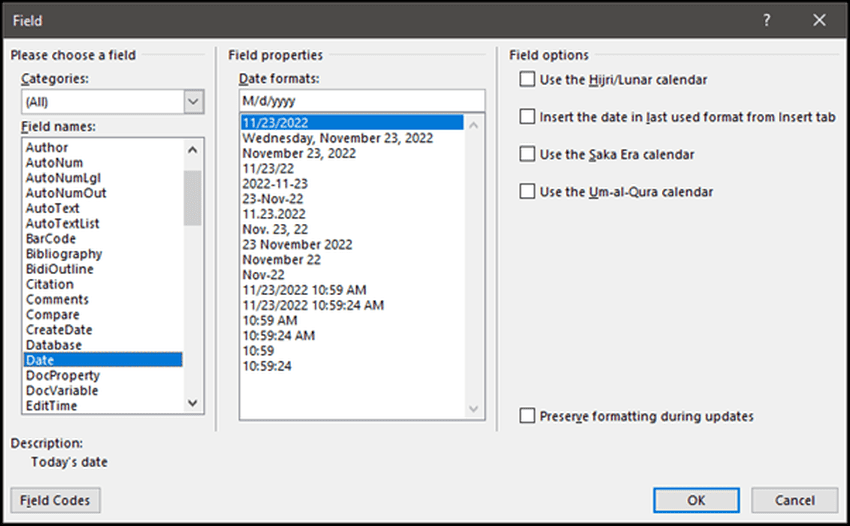
If you want to change the actual look of the field, you do so as you would with any other style. If you want to know more about using styles, please check out that specific post.
How to Insert a Date Picker in Word/ How to insert Date Box in Word
If you are creating a form and want to have a date picker for the users to be able to select from, the process is still doable within Word. However there are a few more steps that you need to take in order to get the result you are after.
Here’s how you do it:
Ensure you have the Developer tab available to you in the Ribbon. If you don’t see it, do the following:
Adding Developer Menu to the Ribbon
- Click on File and then Options (right at the bottom of the screen).
- On the Customize Ribbon tab, select the Developer button. This will display the developer tab in Word:
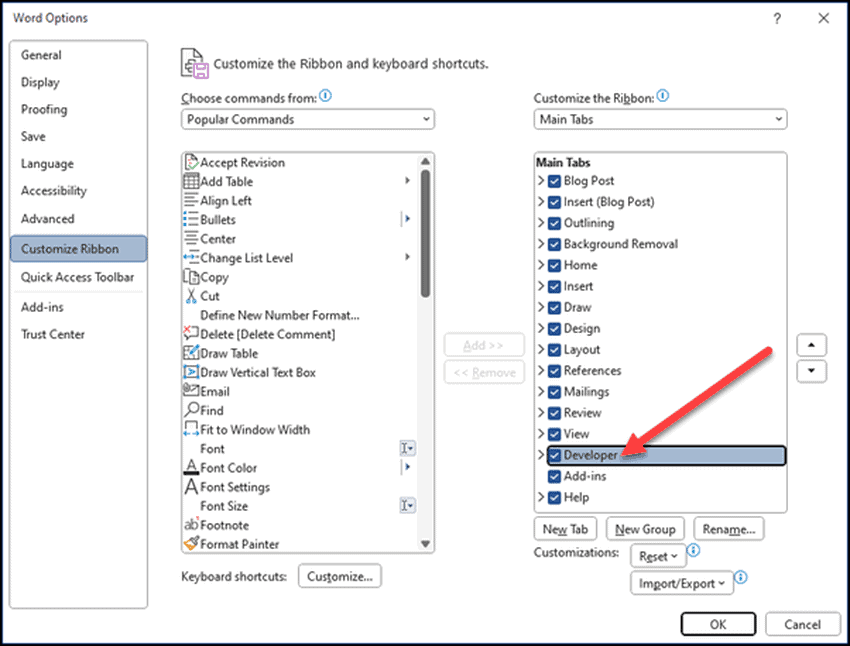
How to Add a Date Picker to Word
Now that you have the Developer tab let’s add a date picker:
- On the Developer tab, click on the Date Picker Content Control button. I’ve included my mouse in this image so you can the hover over:

- Your date box has now appeared, and you can click it to select the date:
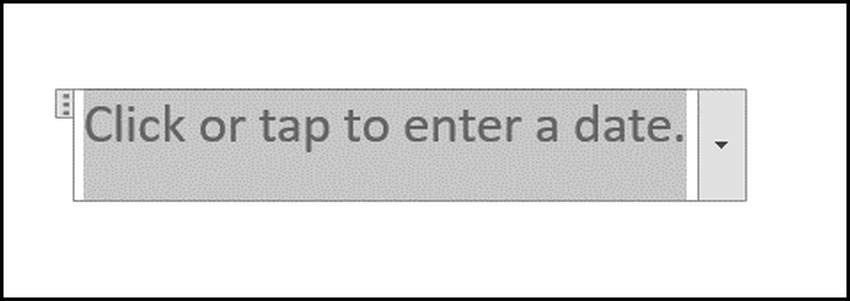
- Simply click on the arrow and your date picker works!
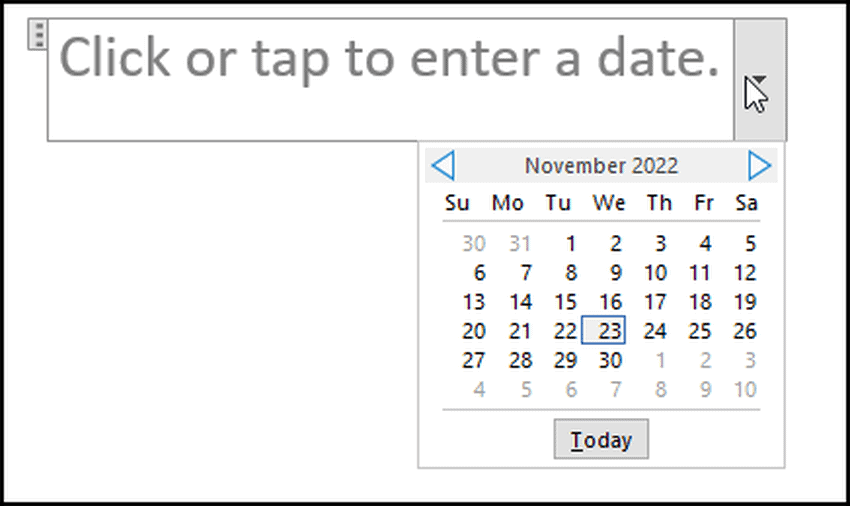
In Summary
We have gone through a variety of different ways on how you can insert a date into Word. With or without automatic updating, showing you an easy shortcut to save you time, and of course, adding a date picker as well. I hope you have enjoyed this post and as always, if you have any comments or questions, please feel free to leave them below. Good luck!
