How to Move a Picture Freely in Word
To move a picture freely in word you need to understand the different way word interacts with a picture. After you insert a picture and click on it, you will see a small Wrap text button on the top right of the picture: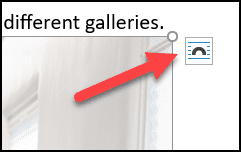
If you click on it you will see a variety of different options regarding your ability to move the picture around the document. Let’s go through each of them to give you an understanding of what options you have so you can learn how to move a picture freely in Word:
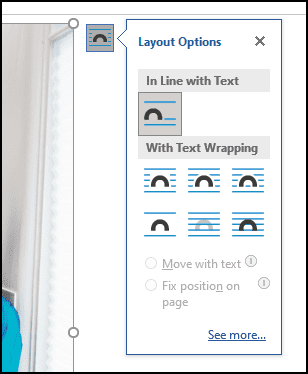
As you can see, there are two different types of layout options: In line with text and with text wrapping.
In Line with Text
What this means is that the picture will be part of the text. Just like this sentence that you are reading, the picture will act in the same way. If you press space bar, the picture will move one space. Obviously, as the picture is going to be bigger than a keystroke, it may get moved to the next line. However, it is essentially one big piece of text. When you go to move it, you will see a regular curser and line showing you where it will appear in the text:

As you can see, the picture here sits on the same line as the text line.
Square:
With this option you can move the picture wherever you want, and it will not be limited to the text. It will always be part of the text but not over it. In a sense, you create a square where the box will fit in. It goes through multiple lines as opposed to just a single one. It will not sit on a line but rather anywhere you put it.

Tight
This mode is very similar to square. The only difference being the margins on the side of the picture. The image above (for square) and below (tight) are exactly the same apart from this difference.

As you can see, as the Tight layout has been selected, there is less space between the picture and the text, thus allowing a further line of text to site next to the picture.
Through
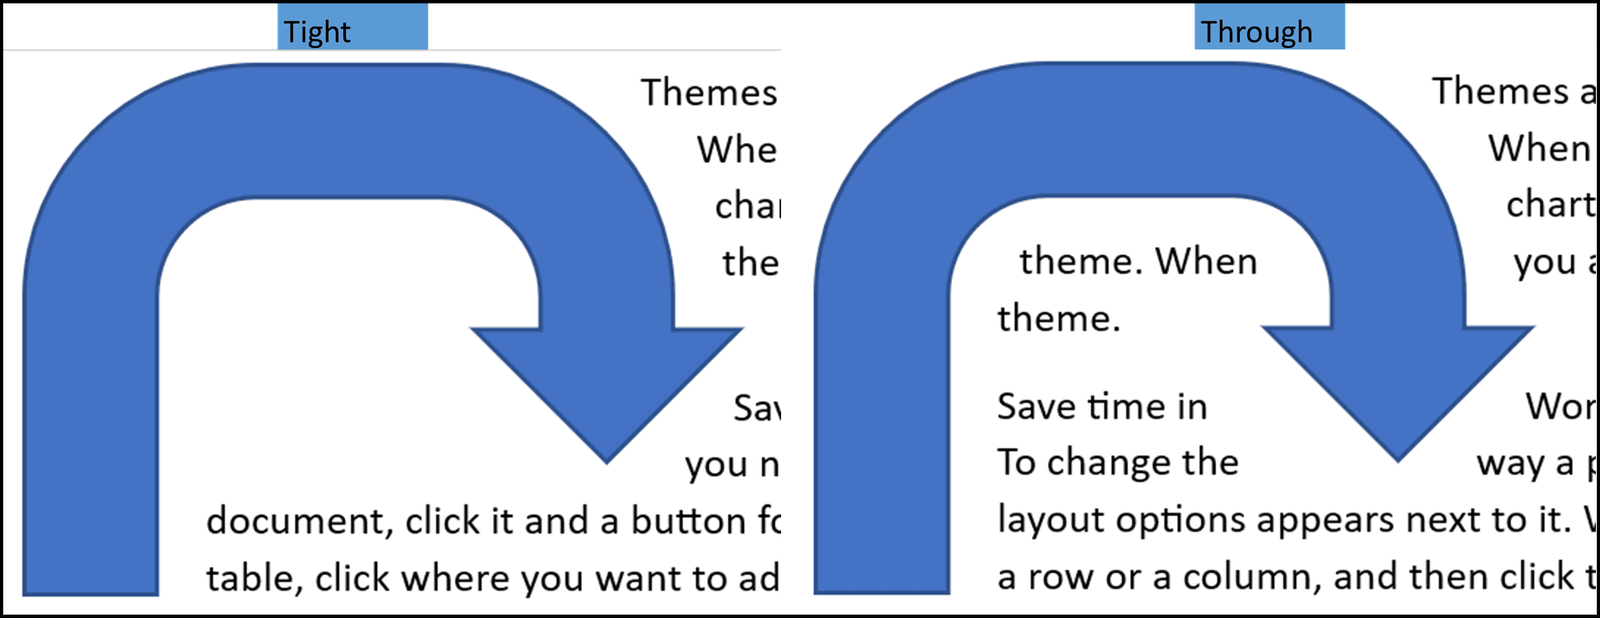
If you are dealing with a box type picture, such as the one above, there is no difference between tight and through when it comes to freely moving an image. However, you have an image with a “hole” in the middle there is a clear difference between them, as long as you edit the wrap points.
Editing Wrap Points
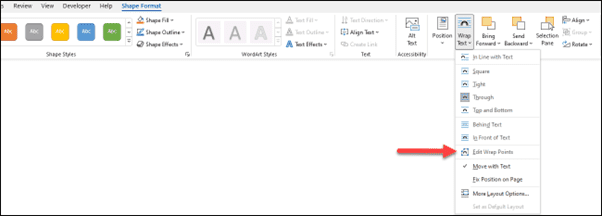
These are points on the picture or image that tell word where to wrap the text. To see them you have to navigate to the Shape format tab on the ribbon and then select the Wrap Text button:
You will then see the image with the Wrap Points:
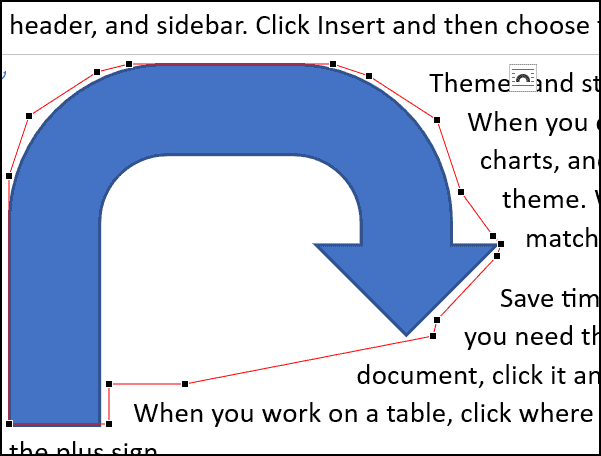
I’m going to move these points around the image so that just the arrow itself if covered, not anything in the middle of it.
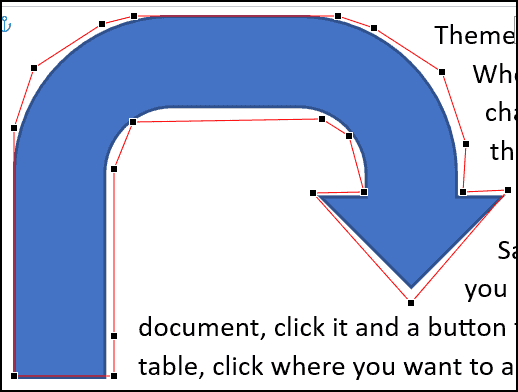
It doesn’t need to be perfect, so this is fine.
If you are on Through, then the text will actually go inside the area that I have created with the wrap points and if you are on tight then the text does not go there:
Top and Bottom
In this situation the picture takes up the whole line and there will be no text at all apart from in the picture:

Behind Text
Here, the picture doesn’t actually take up any extra room. However, you will only see it behind the text. It’s just going to be a background image really.

In Front of Text
In this setting, instead on the picture being behind, or part or the text, it sits right on top of the existing text, thus hiding the text:

Changing the Default Settings When You Add a Picture
Although it’s important to know about the different layout options of an image, it would definitely be easier if you have the one that you normally use as the default. With this in mind, let’s go through the steps you need to take to change the default settings:
- Click on File and then on Options:

- In the Options window, click on Advanced and then scroll down to the Cut, copy, and paste section. There you will see the Insert/paste picture as. This is where you can change the default settings when you come to insert a picture into Microsoft word.
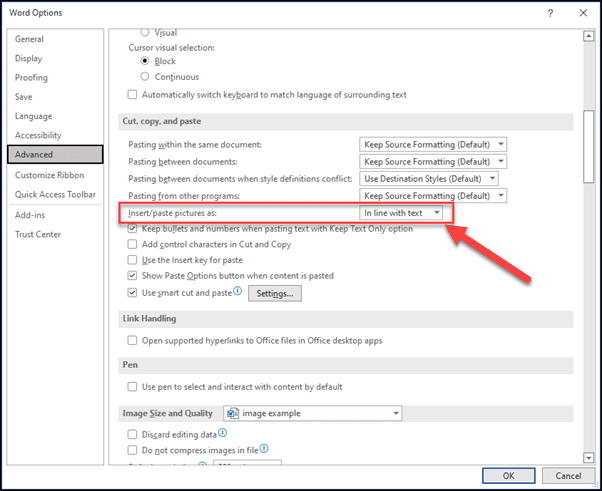
That’s it. You have changed the default settings of adding a picture to your word document. Be aware though that you generally have to close and then reopen word for the changes to take effect. In fact, in some cases, it’s worthwhile restarting your computer as well just to give the program time to update correctly.
In Summary
In this post I’ve gone through how to move a picture freely in Word. I hope you have found this useful and that I’ve enabled you to move your pictures to anywhere you want to on your document. As always, if you have any questions or comments, please leave them below and I’ll do my best to answer them. Good luck!
