If you have a long list then you will have a whole lot of white space in your document. This makes it hard to read and not particularly easy on the eye. So let’s go through the simple steps to turn a long list into a two-column list in word.
If you want to know more about how to create columns I would recommend looking at my other post on the topic – How to Create Columns in Microsoft Word. This post deals with lists and covers columns from a different perspective.
Method #1 – Using the Column function in Word
- Highlight the text in the list.
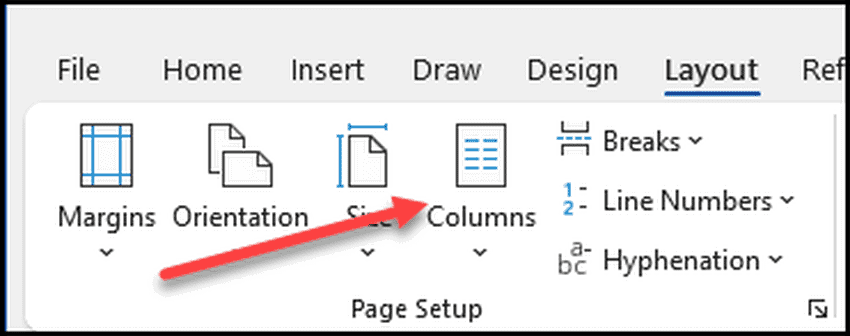
- On the Layout tab in the Ribbon, click on the Columns button:
- It’s worthwhile checking out the different way the content looks as to whether you should have two or more columns.
In this list below I have 46 different items. However, when I convert it into columns using the column setting in Word, there is a lot of white space used and to be completely honest, it doesn’t look very good:

Changing it to three columns also doesn’t really seem to do anything different.
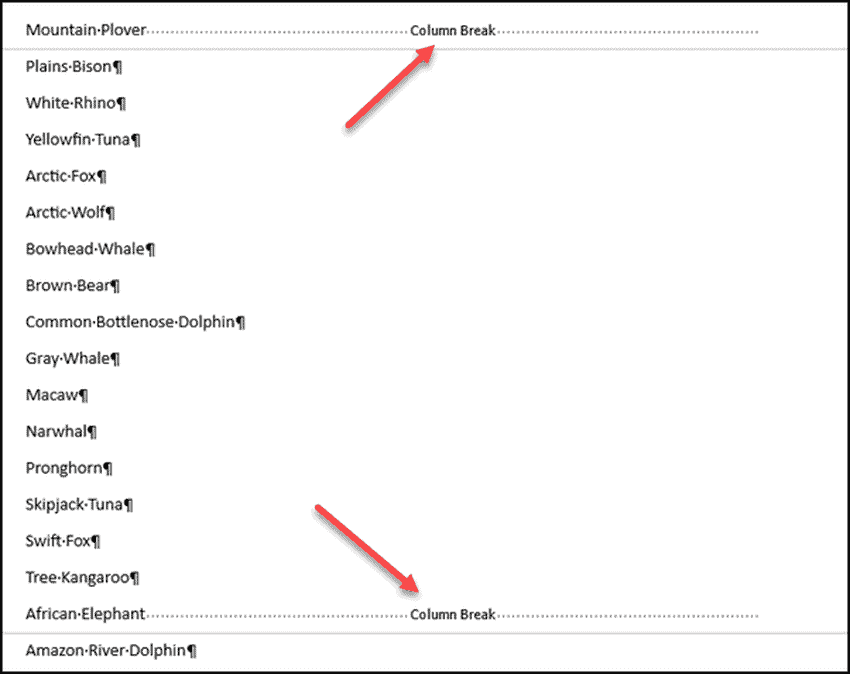
What you can do is put in column breaks where you want the new column to start. In our case, since there are 46 different items on the list, let’s try putting column breaks after line 16 and 32.
- Place your curser where you want the column break to appear. In this case after Mountain Plover.
- On the Layout tab in the Ribbon, click on the Breaks Button and select Column.

- Repeat this again after line 32 (in our case after the African Elephant).
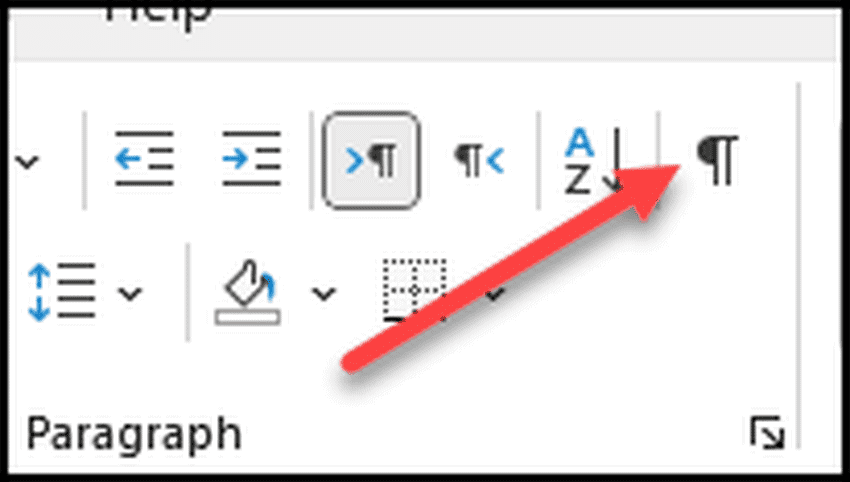
- In order to actually see these in action, it’s worthwhile clicking on the Pilcrow sign in the Home tab of the Ribbon to ensure that you have actually put them there:
- Here is how it looks before I apply the columns:
- Select all the text and then use the columns button to select three columns. It now looks much better:

However, if you have long list this is going to get tricky and really time consuming. Is there a quicker way of getting this done?
The answer is YES!
Splitting Columns in Word Using Excel
What we are going to do is copy the text into excel and then split it there. You can do it by look and it’s very easy to do so. There are two different ways to do this. The first way is by using a full version of excel and the second is by inserting an excel sheet inside your document. I am going to recommend only the first way as you want to be able to see the information visually and the best way to achieve this is by the full version of the program.
Method #1 – Using Microsoft Excel
- Paste the list into excel.
- On the Page Layout tab in the ribbon, on either the Gridlines or Headings section, click on the Print checkbox to see what you can actually fit on the page:
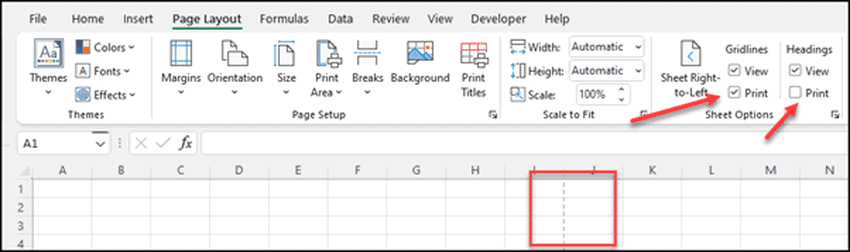
- As you can see, the dotted line has appeared, and you can now see what the actual printing area is. This can be used as a guide to work out how many columns you can fit into your document.
- Highlight the different sections and move them around to see what it looks like:
- As you can see, there is no more space for adding another column. Therefore, the best option for this case is to have three columns
- Copy the list that you have created in excel and paste it into word
- In order to remove the lines, click on the little icon on the top left of the table to highlight the whole thing:

- In the Paragraph settings on the Home tab of the ribbon, select the No Border option. This removes all the lines from the table:

There is actually another way of doing this via VBA in Excel.
Use VBA in Excel in Split Columns in Word
- Paste your list into Excel.
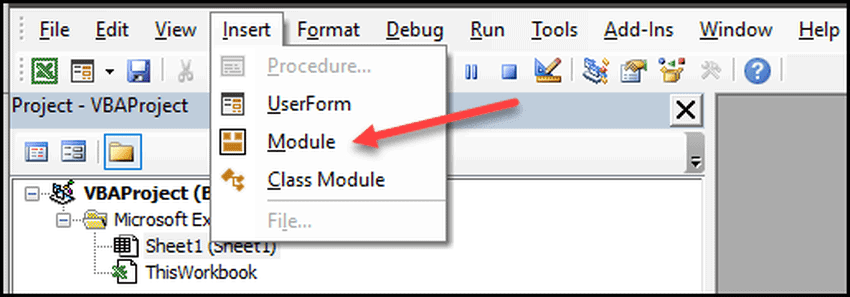
- Hold down the ALT + F11 key to open the Visual Basic application.
- Click on Insert and then select Module:
- Copy the following code in the window that pops up:
Sub SplitIntoCellsPerColumn()
'updateby Extendoffice
    Dim xRg As Range
    Dim xOutRg As Range
    Dim xCell As Range
    Dim xTxt As String
    Dim xOutArr As Variant
    Dim I As Long, K As Long
    On Error Resume Next
    xTxt = ActiveWindow.RangeSelection.Address
Sel:
    Set xRg = Nothing
    Set xRg = Application.InputBox("please select data range:", "Split List in Equal Columns", xTxt, , , , , 8)
    If xRg Is Nothing Then Exit Sub
    If xRg.Areas.Count > 1 Then
        MsgBox "does not support multiple selections, please select again", vbInformation, "Split List in Equal Columns"
        GoTo Sel
    End If
    If xRg.Columns.Count > 1 Then
        MsgBox "does not support multiple columns,please select again", vbInformation, "Split List in Equal Columns"
        GoTo Sel
    End If
    Set xOutRg = Application.InputBox("please select a cell to put the result:", "Split List in Equal Columns", , , , , , 8)
    If xOutRg Is Nothing Then Exit Sub
    I = Application.InputBox("the number of cell per column:", "Split List in Equal Columns", , , , , , 1)
    If I < 1 Then
        MsgBox "incorrect enter", vbInformation, "Split List in Equal Columns"
        Exit Sub
    End If
    ReDim xOutArr(1 To I, 1 To Int(xRg.Rows.Count / I) + 1)
    For K = 0 To xRg.Rows.Count - 1
      xOutArr(1 + (K Mod I), 1 + Int(K / I)) = xRg.Cells(K + 1)
    Next
    xOutRg.Range("A1").Resize(I, UBound(xOutArr, 2)) = xOutArr
End Sub
- Press F5 to run the code. You will see the following pop up:

- Select the cell where you want the results to go into:

- Enter in the number of cells you want per column:

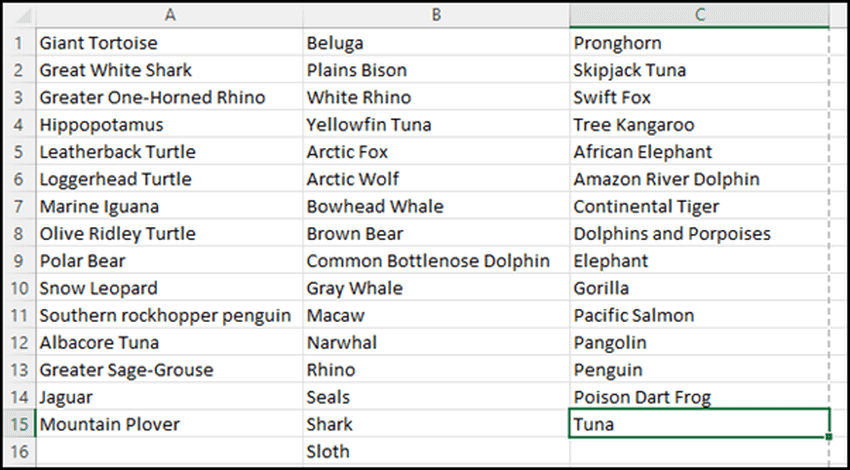
- The result appears immediately. I put in 15 and this is the result I got:

Then you can simply copy the list from inside Excel and past it into Word as explained above. Remove the lines and you will have a perfect columned list.
Method #2 – Inserting an Excel Sheet in Word
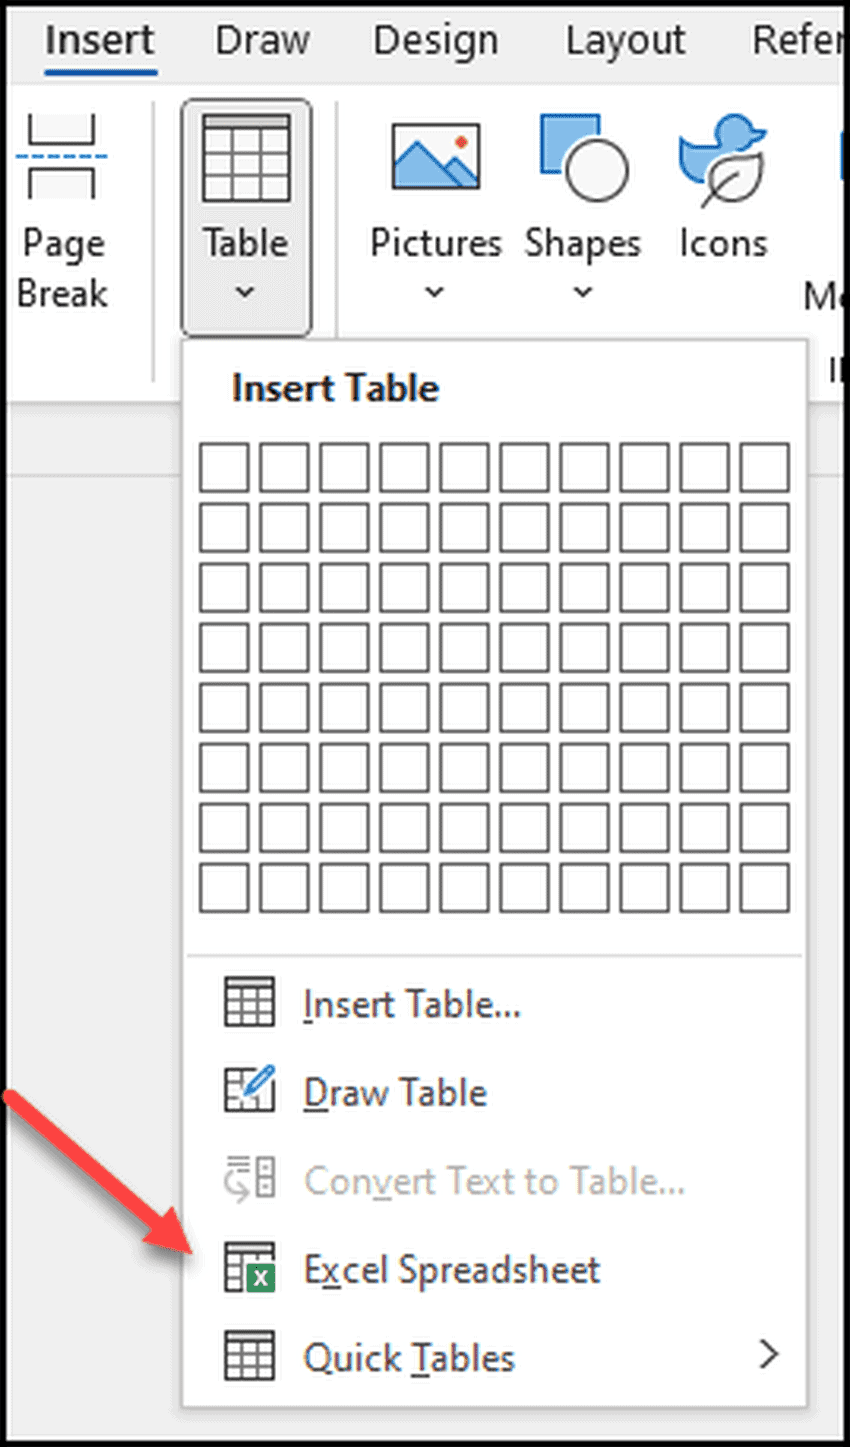
- On the Insert tab of the Ribbon, click on the Table button and then on the Excel Spreadsheet button:
- You will see a spreadsheet has appeared in your document. Paste your list there and then you can manipulate it as I’ve described above.
In Summary
Knowing how to use columns in word is a good skill to have. Not just with the column settings on word but also using excel and the VBA to really do it quickly and easily if you have a large amount of data that you want to put into a column. I hope you have enjoyed this post and found it useful. If you have any questions or comments, feel free to leave them below. Good luck!