Need to know how to line up text in word? Learn how to align your text so that it looks the way you want it to. There are a variety of options when it comes to justifying your text and it’s a good idea to have a good grasp on them. From, left to right, right to left, centering, and of course justifying.
How to Line Up Text in Word
If you just need to line up, or align a paragraph or similar the simplest way to achieve this is the following:
- Highlight the text that you want to line up.
- On the Paragraph menu click on the desired style you want:
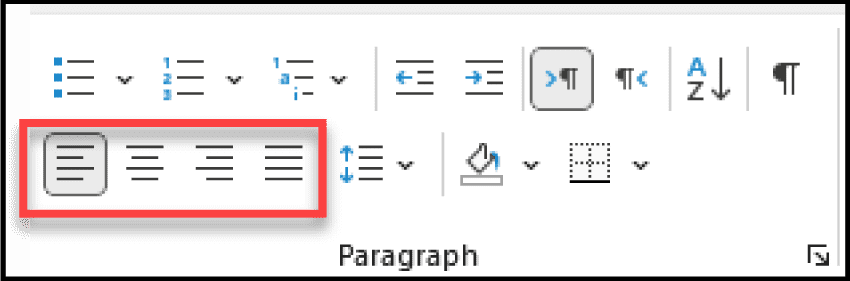
- It’s pretty obvious but just in case; from left to right the order of the buttons is: left, centered, right, and justify (this means that all the lines will start and finish in the same place.
- And that is it!
If you want to have a specific section or similar with a specific alignment I suggest you use and edit the styles in Word. To learn how to do this, it’s worthwhile checking out my post on that particular subject.
How to Justify Text in Word without Spaces
You may have a document where the last line of the document only takes up a bit of the line. However, since you are in justify mode, the words are spread out in rather an ungainly fashion.

The easiest way to solve this is by checking how this was done. What has happened is that instead of pressing Enter at the end of the paragraph the author has press Shift + Enter together. There are two different ways to fix this. The first option is good if there is just one isolated incident. The second is if there are more than one and manually changing them is time consuming.
Justify Text for End of Paragraph Method #1
In the Paragraph section of the Home menu on the ribbon, click on the Show/ Hide Pilcrow button:

This shows all the charactors on the page. You will notice that at the end of the paragraph there is an Enter sign there. It’s actually a Shift + Enter sign:

Simply place the curser there and delete it. This will revert the text on the last line back to normal.

Justify Text for End of Paragraph Method #2
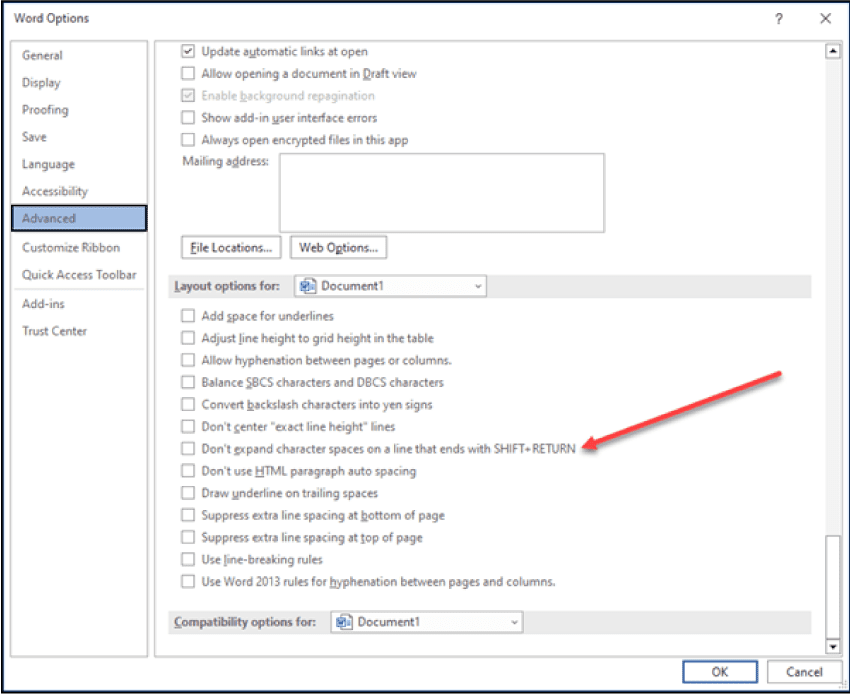
On the File Menu in the Ribbon, click on Options:

In the Advanced menu, scroll all the way down to the bottom of the list. There you will find an option called: Don’t expand character spaces on a line that ends with SHIFT + RETURN. Click this option and then OK:
All the places on the document where the text is spread out on the last line of a paragraph will look normal again.
How to Justify Text in Word without Spaces
You may notice that in your justified text there is too much space between the words. It can actually look quite ungainly. For this reason, many advise against using the justified option as it can be hard on the eyes. However, there is a way to sort this out. It’s worthwhile doing this in the Styles menu and adding or editing a style for this purpose. To learn how to do this see that specific blog post.
However, for our purposes, it’s enough to just do it locally so that you will see the difference. Take a look at these two images. They have the same text. The only difference between them is the spacing:
Normal Text with Justification

Edited Text with Justification and Condensed Spacing

You can see the difference very clearly. In order to achieve this, do the following:
- Highlight the text that you want to change. On the Home menu in the ribbon, click on the little arrow by the Font section in order to open the font options:

- On the pop-up window, click on Advanced and then on the Spacing options. There are three there, Noraml which is the default, Expanded, and Condensed. You need to select the Condensed option.

- Then, change the amount to something less than one. You can play around with the different optinos to find the one that you are happy with.
For me, this changes the entire look of the text and even though I prefer to always use left justified, with this option I’m not against someone using justified if they like the way it looks.
In truth, if your document isn’t too long, it’s worthwhile going through each of the sentences and seeing what you can improve. This method works for highlighted text so you can play around with it and see how it looks.
In Summary
There are a lot of different things you can do with the settings on how your document should look. As well as knowing how to line up text in word, you can manipulate it to make your document look good. I hope you have enjoyed this post and as always, if you have any comments or questions, please leave them below and I’ll try my best to answer them. Good luck!