Using columns in Microsoft Word can be a great use, particularly when you have a number of lists. Perhaps you just want to break up the text and make it easier to read. There are numerous uses for columns and in this post, I’m going to show you how to use them, manipulate them and style them to give your document and extra bit of oomph.

What You Going to Learn in This Post:
- How to Create Columns in Microsoft Word
- How to Insert a Column Break in Word
- How to Adjust Their Width
- How to Add Multiple Sets of Columns Correctly
How to Create Columns in Microsoft Word
- Place your curser anywhere on the page. Please note that this will convert the entire document into the number of columns that you select. If you want to just do so for a certain section, see below
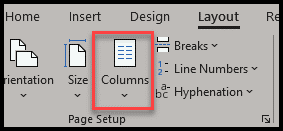
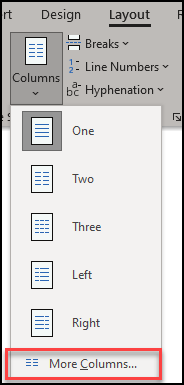
- The easiest way to create columns is to navigate to the Layout tab in the Ribbon and click on the Columns button
- Then select the number of columns you want to have
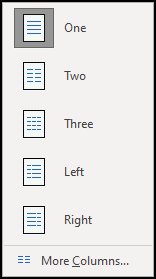
Your document will now have the number of columns that you have selected.
This is the simple way of converting your text into columns. However, you will often be faced with some of the text finishing not exactly where you want. For some reason, perhaps just murphy’s law, you will often find the heading of a section on the bottom of one column and the actual text in the next. This is annoying and there is an easy way to avoid it and that is by using something called a Column Break.
How to Insert a Column Break in Word
A column break is used, in Microsoft speak to: Indicate that the text following the column break will begin in the next column. In other words, it’s a great feature to ensure that you get the start (and end) a column exactly where you want to.
For example if I have the following two paragraphs (taken from Wikipedia):
South Street
South Street is a street in Lower Manhattan, New York City, located immediately adjacent to the East River. It runs from Whitehall Street near the southern tip of Manhattan to Jackson Street near the Williamsburg Bridge. The Franklin D. Roosevelt East River Drive, in an elevated portion known as the South Street Viaduct, runs along the entire length of the street.
History
The East River waterfront of lower Manhattan, which includes South Street (so named because it is on the south side of the island), played an important part in the early history of New York City and became, over a period of two hundred years, one of the most prosperous commercial districts in the city. This development of the South Street Seaport area from a small cluster of wharves in the 18th century to an important part of the leading port of the nation in the mld-19th century reflects the rise of New York City as an international center of commerce. As early as 1625 when the Dutch West India Company established a trading post at the foot of Manhattan Island, the area south of today’s seaport served as a landing site for incoming boats. The Dutch constructed a small floating dock which extended into the East River from what is now Broad Street. As lower Manhattan, then New Amsterdam, became more populous, a few streets were cut through the surrounding countryside. One of the first was Queen Street (now Pearl Street), laid out in 1633, which rapidly became the core of the mercantile community of 17th century Manhattan. Queen Street ran along the waterfront until the latter half of the 18th century when landfill extended the eastern boundary of Manhattan out to Water and later to Front Street.
As you can see, the second paragraph is much longer than the first one. Yet, I want the second paragraph to start on a new column and not halfway through the first one. So how do I go about accomplishing this?
The answer is through using a column break.
How to Insert a Column Break in Word
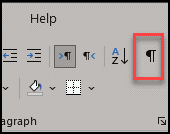
In order to see where the column break is, I recommend you pressing the paragraph marks button. This enables you to see every space and change visually. Do this by pressing the button on the Home tab on the ribbon.
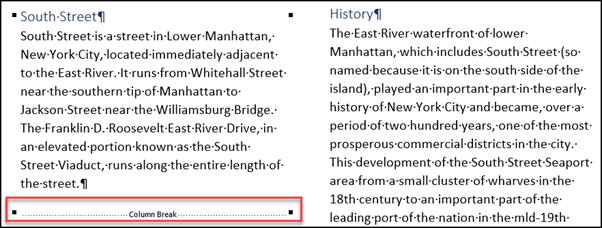
- Put the curser where you want the next column to start.
- Navigate to the Layout tab on the ribbon and then select Column from the Breaks menu
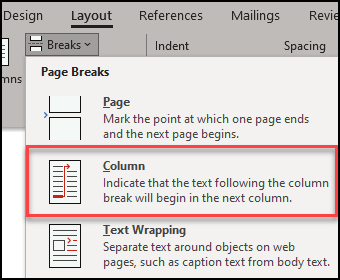
- You have successfully “forced” the column to split where you want it to:
How to Adjust the Column Width
You may find that you want to have different column widths on your document. For example, if you have three you may want the center column to be wider than the ones on the side. Let’s see how you can do this. On our original excerpt, the two columns were not at all the same size. I want to have the two columns ending at about the same point on the page.
- Ensure that you have set the Column Break at the correct point
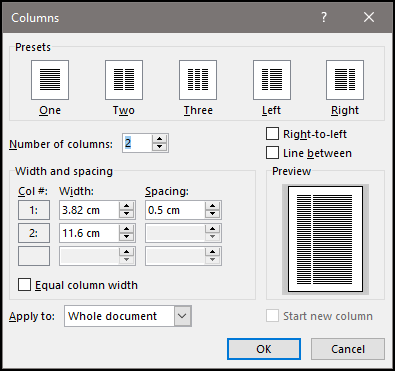
- On the Columns button on the Layout tab select the More Columns option
- You will see the following dialog box
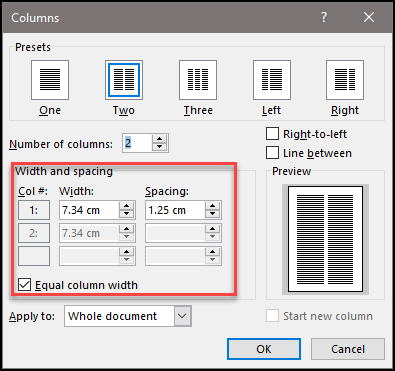
- What we are going to do is focus on the area that I have highlighted in the red box – Width and spacing.
- Make the second column wider than the first.
- Ensure that the Equal column width is unchecked (not like the image). Otherwise the change will simply not work.
- The annoying thing about this tool is that you cannot see the difference until you click OK. However, what’s important is that it does work. Just use trial and error and you’ll get it correct in the end.
- For the two columns that I’m using I going to change the second one to 12. This is how it looks now:
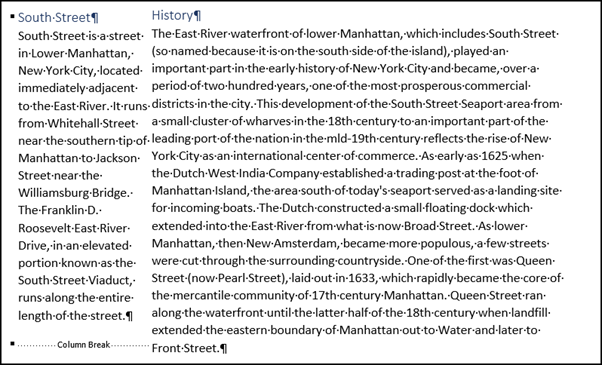
- As you can see, there isn’t really enough space between the two columns so I have to sort that out as well.
- To do so, in the same dialog box, change the spacing to something higher. I’m going to change it to 0.5. This has actually automatically made the second column smaller but I’m pretty happy with the result as I don’t want to make the first column any thinner than it already is:
- Here is the end result without the paragraph button selected:
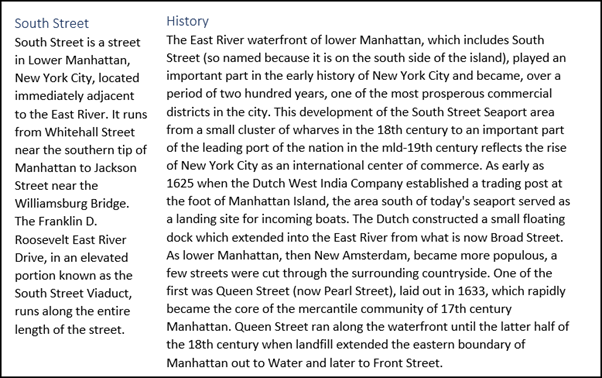
Pretty easy and it has come out nicely.
Other Options to Creating Columns
There are some users who create columns artificially using tables. Whilst this is also possible, unless you have a specific reason for doing so, I don’t recommend it. The reason for this is that once you start messing around with tables, removing the lines to make it appear as if they are columns, you are running into all sorts of complications with spacing. You have to space the cells, the space in between the cells, space before that table and after it. You can get it to work but to be honest, if you know how to use the column settings in word, you will save yourself a lot of time. That’s why I’m not even going to touch how to make columns using tables in this post.
In Summary
We have seen how to create columns, how to edit them, how to add column breaks and how to resize them as well. Basically, everything you need to know about columns in Microsoft Word. I hope you have enjoyed this post. If you have any questions, please leave them in the comments below and I’ll do my best to answer them. Good luck creating the perfect columns for your documents!
