Something that really lights up your documents, especially when you are producing a thesis, book, long document or the like is a title page. These typically contain information about what the document is called, the author, date, and other pertinent information. They can also contain some graphics to draw the reader in and get them excited to read what you have written. Let’s see how you can make one and add some pizzaz to your Word document.
Do You Always Need a Cover Page?
The simple answer is no, of course not. However, I have found that when giving in a paper, report to a superior, a nice cover page always creates a good first impression. If you are on the border between an A or a B, the cover page will often get you over the line. It may be subconscious, but people like a cover page when they are checking through a paper. So, in my opinion, always go on the side of just creating one instead of not being sure. They are easy enough to make, so just ahead and make one.
It’s important to point out here that although the title of this post is about a title page, in Microsoft Word the correct phrase to use is Cover Page. In fact, this is what Microsoft uses for the button that we will get to know very soon.
Creating a Title Page Using the Built-in Microsoft Word Options
In order to add a cover page to your document, or even if you want one to start out, there are a number of different options available to you.
Using the Built in Style
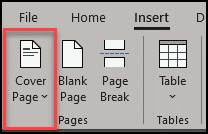
Navigate to the Insert tab on the Ribbon and select the Cover Page Button:
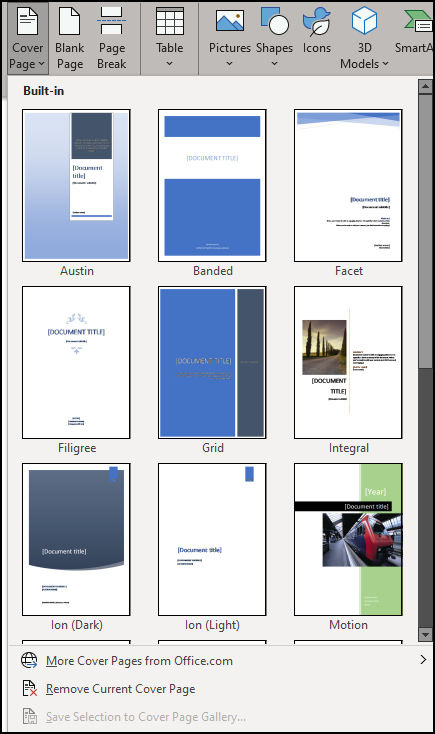
Simple select one of the options that appear:
For this example let’s go with the Ion(Dark) option
As you can see, there are a number of different fields in this option and there are two different ways to fill them in. These things are called Quick Parts and you can learn more about them in the dedicated post about them.
If you are doing it just for one document though, what I recommend is just to type in what you want.
Method #1 – Just Fill Them In
Navigate to the different fields in the cover page and click.
Press delete and then type in your title:
That’s it, easy as pie.
However, if you are constantly using Cover Pages then it’s worthwhile spending a little bit of time knowing how to use the Quick Parts of Field and this will save you time in the long run.
Method #2 – Using Quick Parts in Your Cover Page
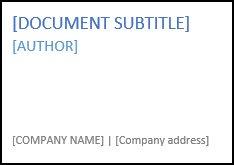
As you can see on the cover page that I’ve created, there are a number of fields that are empty:
The reason for this is that they are blank somewhere else in the document. What you can do is to make them self-populate or fill in themselves by using the settings that are available in Word. In order to do so, do the following:
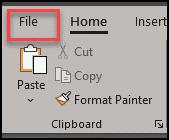
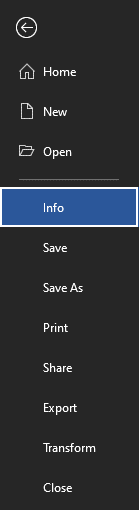
Navigate to the File tab on the Ribbon:
Select the Info option:
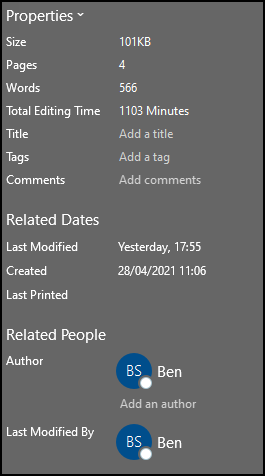
On the right side of the screen, you will see the Properties list:
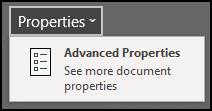
Click on the Properties Drop down list and select the option there
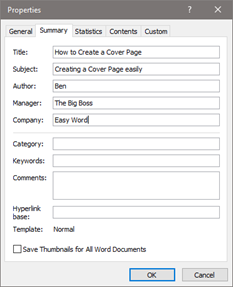
A pop up opens and from there you can add all the main details that you want
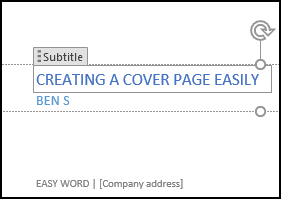
As you can see, I have actually filled this in so that when I now create a new cover page, this information will be automatically filled in:
As you can see from the image, the Subtitle field has been selected and in fact, it has now been automatically filled in.
Once you have saved the general information for the document, you have it saved in all documents. This means that whenever you create a cover page, the general information is already there. This is important if the document goes through a number of revisions.
In truth though, I feel that these things are pretty arbitrary aside from the company name. What I do is just type them in when I need to because playing around with the settings behind the scenes can just be more trouble than it’s worth. However, I have provided these instructions just for you to experiment and see what is best for you.
Cover Page Template Limitations
Whilst there are plenty of different cover pages to choose from, oftentimes you want something that is unique to you and to the document. It’s obviously difficult to cater for everyone and even though there are many cover pages available both in your normal Word and online, you sometimes want something for you. Therefore it’s important to know how to make a cover page that is styled the way you want.
How to Create Your Own Cover Page in Word
The first thing that you want to do when you are creating a unique cover page is to plan what you want there. Here is a helpful list of the options that you can choose from:
Your Name
Company
Title
Date
Border
Photo
Opening excerpt
Class
Professors’ name
School
Number of pages
This of course is just a general list and you can choose whatever you want. For this example I’m going to use a border, My name, Company, Title, and Date.
Step By Step Cover Page
Create a new page at the top of the document you are working on.
I’m just going to create a simple border by inserting some lines around the page:
I want to put the date at the top right corner, near the top. Then I want the Title in the center of the page with my name underneath it. Finally, I want the Company name at the bottom of the page.
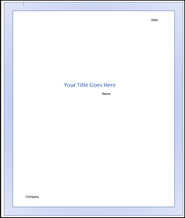
In order to put the text where you want it, it’s important that you use text boxes and not just plain text such as typing in where you want. The reason why this is so important is that without doing so, only the frame will be saved and not the rest of the cover page. Here is how it looks now:
Obviously since I have created this I want to be able to use it wherever I want in new documents. For this reason we have to save it as such.
To Save Your New Cover Page
In order to save your new cover page you need to select everything. The easiest way to do so is by selecting Ctrl + a on your keyboard. It should look like this if you have done it correctly:
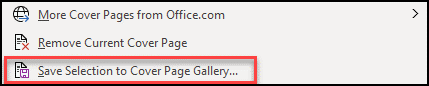
Now, navigate to the Insert menu and select the Cover page option again. You will see at the bottom of the option one that states: Save Selection to Cover Page Gallery
Once you have selected this you will get a pop up window where you can fill in all the pertinent information that you like:
For this example I’m going to call it Basic Cover Page.
Now, when I look for it in the Cover Page drop down, I can see it clearly:
Using Quick Parts and Field to Create a Cover Page
Although I’m not the biggest fan of fields in Word, for some of the information it’s useful to create the cover page with fields from quick parts instead of having to type the information in yourself.
What will happen is that when you use the fields as part of your cover page, they will automatically update to whatever you have set. Let’s see how:
In order to use fields in your cover page, do the following:
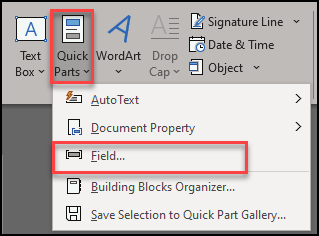
Whilst the curser is in the text box, on the Insert tab of the Ribbon, click on Quick Parts and then on Field.
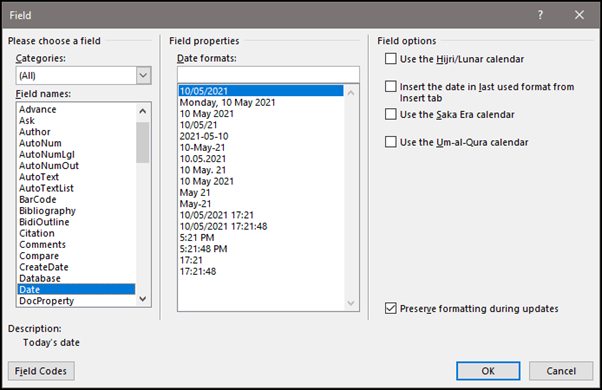
In this instance I want to add the date so in the window I need to select date
There are many different options as you can see, but I’m just going to select the top one. It’s important to note here that you can have your own style here as well. Just select the one that’s closest so what you want and then edit it in the box above the Date formats.
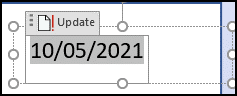
Press OK and your date will now appear in the correct format in your new cover page
As you can see, you can Update this whenever you want by simply pressing on the Update button.
You can use this method for any number of fields that you want to add.
Removing a Cover Page That You Have Saved
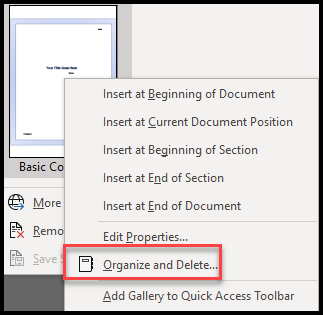
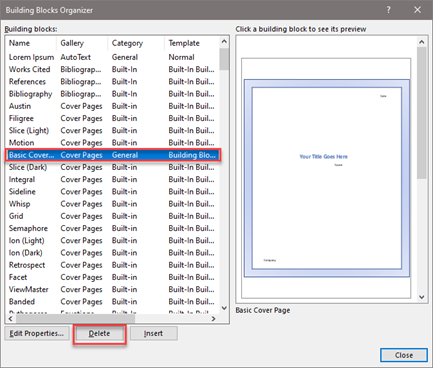
If you have made a mistake and want to remove the cover page that you have created, that’s pretty easy to. All you have to do is right click on the cover page that you want to delete and then select the organize and delete.
You are then taken to a new window with the cover page in question selected. All you then need to do is to hit delete, and you have removed the cover page:
In Summary
We have seen how you can use the inbuilt features of Word to create beautiful cover pages. You can take them further by editing them and saving them as such. Or you could create a title page to your own liking and save it for further use. I hope you have found this post helpful. If you have any questions, please leave them below and I will do my best at answering them. Good luck in creating beautiful cover pages yourself!