Knowing how to add a page break in word is something that you often need to do. There are many different times in your use of Microsoft Word that necessitate you using a page break. Let’s go through the different types of page break, when you need them, when you don’t need them and of course, how to add them.

When Do You Need to Add a Page Break?
If we look a large document in word, there are normally a few different sections to it. They can include a cover page, table of contents, different chapters/sections, and index and bibliography as well as other sections. Of course, it won’t look very good if the cover page isn’t really a cover page as it has a little bit of contents in it.
For this reason it’s important to add a hard page break after each of these types of sections.
As I wrote, you have to add a hard page break. And that means that I now have to answer the question:
Is There a Difference Between a Hard Page Break and a Soft Break?
In a word, yes, there is a difference between the two things. One of them you have to manually add and the other just happens by itself.
What Is a Soft Page Break?
A soft page break is just something that happens automatically when you get to the end of a page. Microsoft Word is designed for using for printing documents according to the different sizes of the page that you have. Typically this is A4 (8 ¼ inches by 11 ¾ inches or 210 by 297 millimeters). When you get to the end of the page that you are working on, word automatically moves onto the next page. You can see this most clearly in the Print layout view.
What Is a Hard Page Break?
A hard page break is one that you have to add yourself. It is called a hard page break because wherever you are on the previous page, if you add it, even if there is ample space on the previous page, it is forced to go to the next one. This is the typical page break that people ask about.
How to Add a Manual Page Break in Word
There are two different ways to add a manual page break in word. These are the details for the latest version of office 365. For older versions of word see below:
Method One:
- Go to the Insert tab
- Click on page break

You will have inserted the page break
Method Two:
- Press Ctrl + Enter
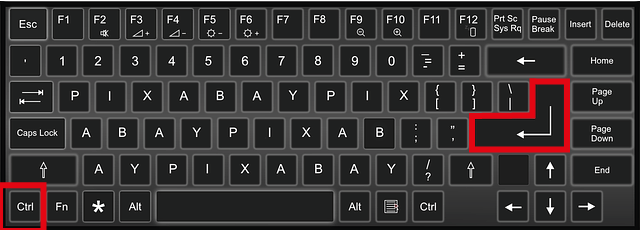
You will have inserted the page break
Older Versions of Word
If you are using a different version of word, first of all I would recommend looking into upgrading to office 365. The subscription is definitely worth it as you will be getting all the latest updates. It is a much easier version to use as you can even see so from adding page breaks.
In order to add a page break from an older version of word the process is as follows:
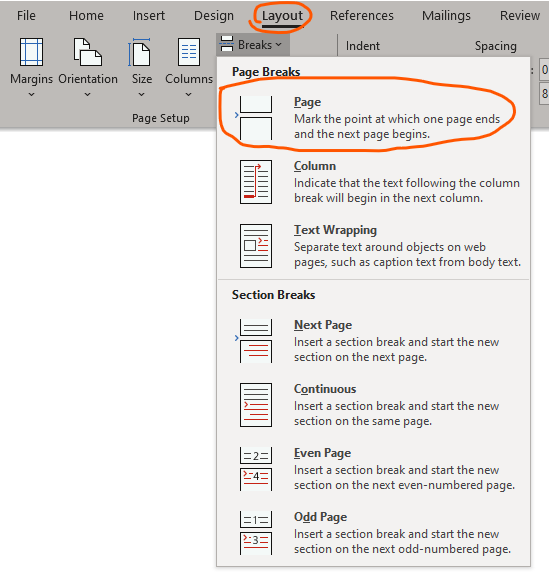
- Click the Page Layout tab
- Go to the Breaks button
- Click Page
And you will have added a hard page break in word.
You can also still use the shortcut which is Ctrl + Enter.
As you can see just from the instructions, if you don’t know where to look in older version of word, you will not be able to find the page break. This is one reason why I am so a proponent of using the latest version of Microsoft Word.
Please bear in mind that even on the latest version of word, you will still find that you can use the “old” method to add a page break by selecting Layout and then Breaks:
How to Tell if You Have Really Inserted a Page Break?
If you are still not 100% sure that you have added the page break, the best thing to do is to add the paragraph marks so you can see what you have added.
In order to do so simply do the following:
On the Home tab, click the show/hide ¶:

Once you have done this, you will be able to see all the different spaces and marks that you have done in the text that you are working on:
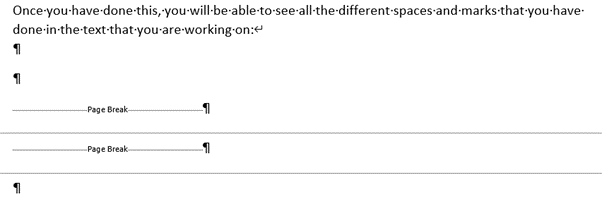
As you can clearly see, I have added two separate page breaks here.
The Other Method of Seeing Page Breaks
Well, it depends on the type of page view you have open. If you look at the bottom right of the window you will see the following:

Each of these buttons tells you which type of view you have currently selected. The most common one is the one I have currently selected. It’s known as the Print Layout. You can actually see what they are called by hovering over them. In this layout, when I add a page break, I can see it clearly on my screen. It will look something like this:

However, that can be a bit misleading, especially if you have text near the bottom of the page. Has the new page been created because I’m at the end of the page or is it there because I added it?
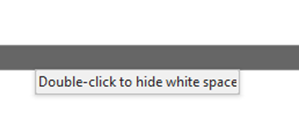
Therefore, what I suggest is to hover your mouse over the space in between the two pages and you will see a little popup that states: Double click to hide white space:
Once you have done that, you will be able to see more clearly if you have actually added another page:

In this image I have actually added two pages to show you how clearly it shows.
And that’s how you can see if you have actually added a page break!
How to Remove a Page Break in Word
Now that we know how to add a page break, we also need to know how to remove one. Knowing how to see the page break is going to help us here.
Click the Paragraph button again on the Home tab:
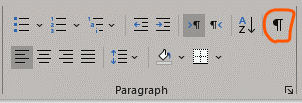
After you have clicked it, you will see where you have added the page break
You can either select the whole page break or just navigate to it.

Then all you need to do is hit delete.
The Other Method
As we had before in adding a page break, there is an alternative way to remove a page break without using the paragraph button.
Navigate to the end of the page and simply press delete.
However, as this method isn’t as clear as the first one, I would tend to not use it, just because there is no need to guess when using page breaks.
And that’s how to remove or undo a page break!
Page Breaks and Microsoft Word
There are a few different ways that you can add a page break in word. They all work but for me at least the easiest method is just to hit Ctrl + Enter. It’s quick and easy. However, you might not remember that so it’s good to know the other ways too.
Good luck in page breaking!
