If you ever copy text from a different source, you have probably faced having to remove the highlighting that comes with it. Learn how to remove highlighting in word in this post. As well as removing the highlight, learn how to highlight multiple things manually and automatically and of course, learn how to stop that from happening as well. Ready? Let’s go!
How to Remove Highlight in Word from Copied Text
If you have to remove the highlight in word from copied text there is one simple method that I use and I feel that it works the best for most situations. It is called Clear All Formatting. This essentially resets the text to the “Normal” style of your document. If you aren’t sure about the different styles, they are found in the Home tab of the Ribbon:

To learn more about the different styles and how they work in your word document, please check out the post I’ve written detailing how you can get the best out of your styles.
There are two ways to remove all formatting. One with your mouse and the other with a keyboard shortcut.
Remove Highlight in Word with Clear All Formatting
With Your Mouse
- Highlight the text with your mouse.
- On the Home tab, click on the Clear All Formatting Button:

With Your Keyboard
- Highlight the text with your mouse.
- On your keyboard press and hold the Ctrl button and then press your spacebar:

This is a good method if you have little bits of text that you need to clean up. However, if you have a chunk of text that has some bolding or any other bits of formatting that you want to keep, the other method isn’t great as it will remove it as well. It essentially removes everything. That’s not a good option every time. Therefore it’s important to know how to remove the formatting manually as well.
How to Remove Grey Highlight in Word Bit by Bit
If you have to remove a grey highlight for example if you have taken an article by Wikipedia. However, on the other hand you want to keep the other bits of formatting such as the bolding and italics. It’s important to note that this is actually called shading and not highlighting. The reason I’m pointing this out is because if not you may get really frustrated by trying to do something that simply will do nothing at all.
These are the steps:
- Highlight the text but be sure not to highlight the end of it as well. As in this:

But not this:

- On the Paragraph section of the Home tab in the Ribbon, click on the Shading button and select No Color:

- This will give you the required result.
I know that this can be annoying, and you have to be careful when selecting the text. However, this does actually work.
Making Sure This Doesn’t Happen in the First Place
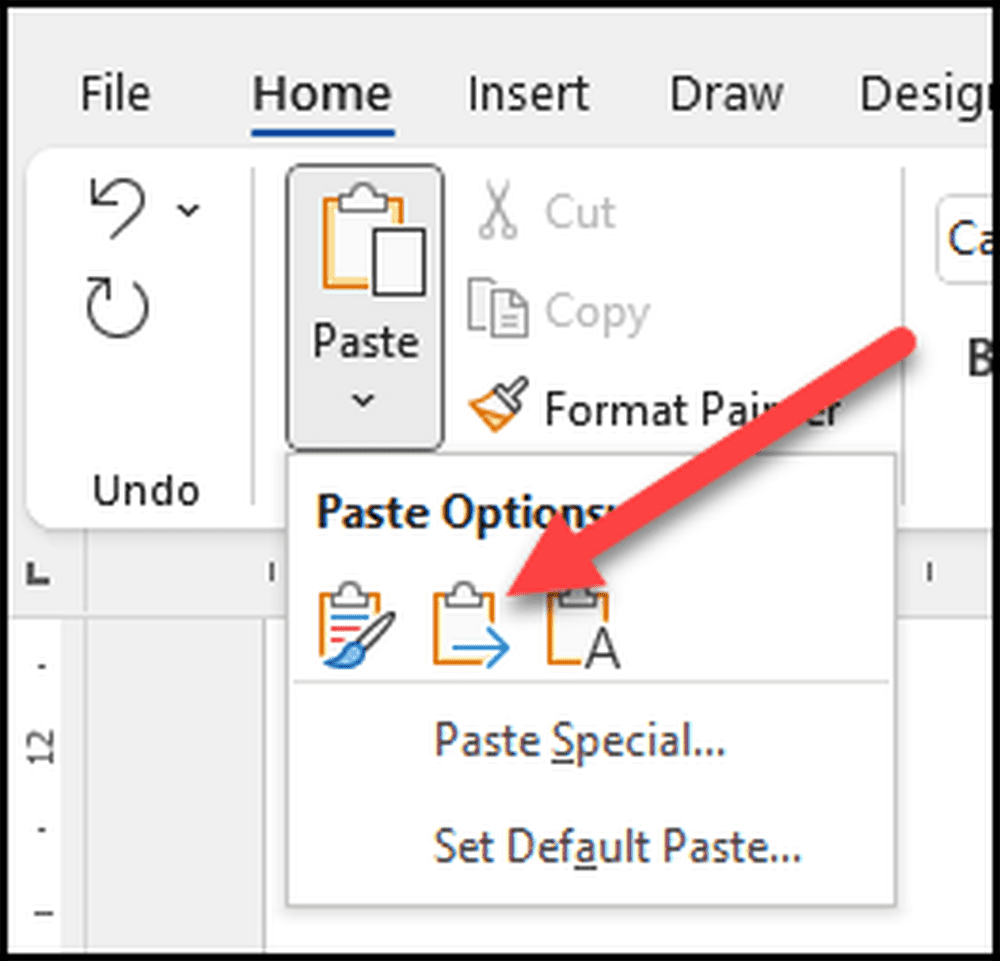
I know that editing documents can be a huge annoyance and cause of frustration. However, a lot of this can actually be avoided by ensuring that when you copy and paste into word you use the merge formatting paste option instead of just pressing Ctrl + V or the normal paste button.
What this does is that it pastes the selected text but takes into account the fact that you don’t want the shading to be copied. Therefore it removes it but keeps the bolding and italics.
You can either right click on your mouse before you paste of use the paste button on the Home screen to bring up the merge formatting option:
How to Remove the Highlight in Word
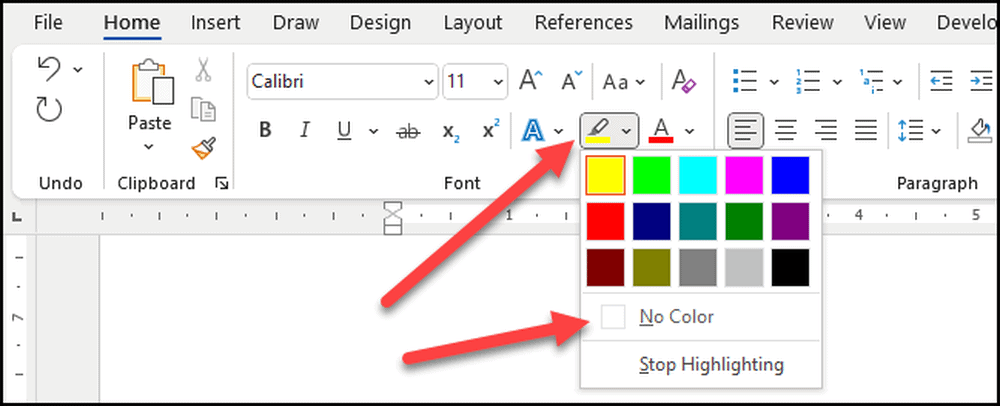
As opposed to shading you may find that some of the text has been highlighted with a different background color. Fortunately, this one is super easy to fix. In fact, with all highlighting, it’s worthwhile checking that this doesn’t work before going on to the above methods as it’s just a click of a mouse button:
- Highlight the text with your mouse or by pressing Ctrl + A to select all the text.
- On the Home menu in the Ribbon, in the font section click on the Text Highlight Color button and select No Color. This removes all the highlighting:
How to Highlight Multiple Things
There may be some parts of the text that you want to add a highlight too. Similar to highlighting a written document that you want to use to help memorize certain sections. If you are reading a long document and want to point out certain words and phrases here and there you may want to put a highlight on those words. This is also a very easy thing to do.
In order to highlight multiple things in your document do the following:
- On the Home tab, in the Font section click on the Text Highlight Color button and select the color that you want to use for your highlighting.
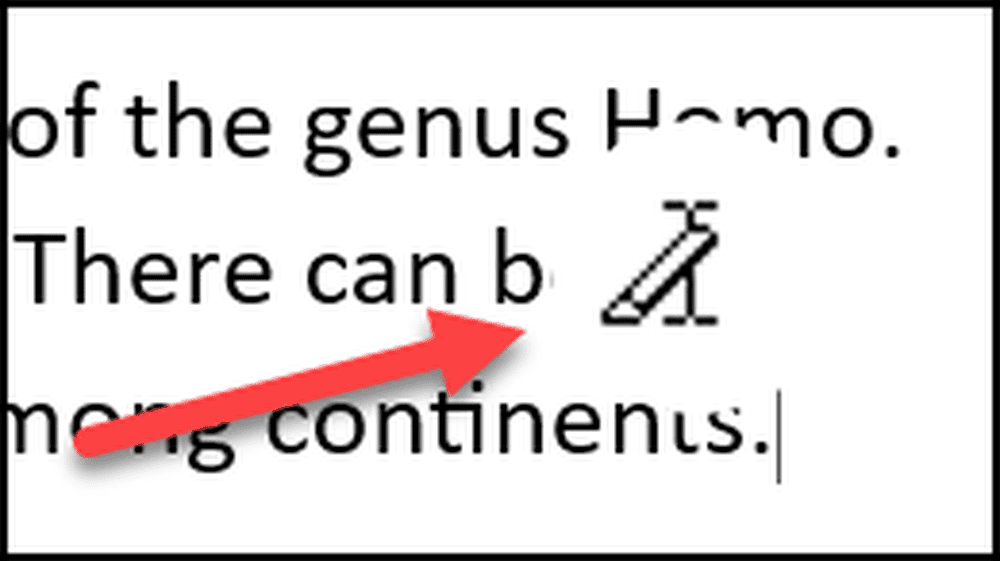
- Mouse your mouse curser over the text and you will notice that the mouse has changed to look like a pen. Click and drag this over any word, letter, or section that you want to highlight. It will add a background highlight to your document exactly where you want it to be:
How to Remove Text Highlight in Word
You can do the opposite to remove the text highlight for certain words or phrases as well. Simply select the no color and you will see the little icon. Drag this across the words that you want to remove the highlight from, and you will be left with a nice clean word instead of the highlights.
Why Can’t I Stop Highlighting in Word?
If you can’t seem to stop highlighting in word follow the above instructions and I’m sure you will be able stop the highlighting issue.
How to Remove Highlight in Word – Using a Macro
The easiest way to remove the highlight is one that a lot of people run away from because it involves using a macro. But honestly, it’s really easy and is completely safe. It’s not some kind of voodoo, it’s just a little bit of code that you’ll paste in, and it will do its job quickly and easily.
- Highlight/ Select the text in your document that you want to remove the highlight from. You don’t need to be as exact here as you were above. The whole section, even the whole document can be selected.
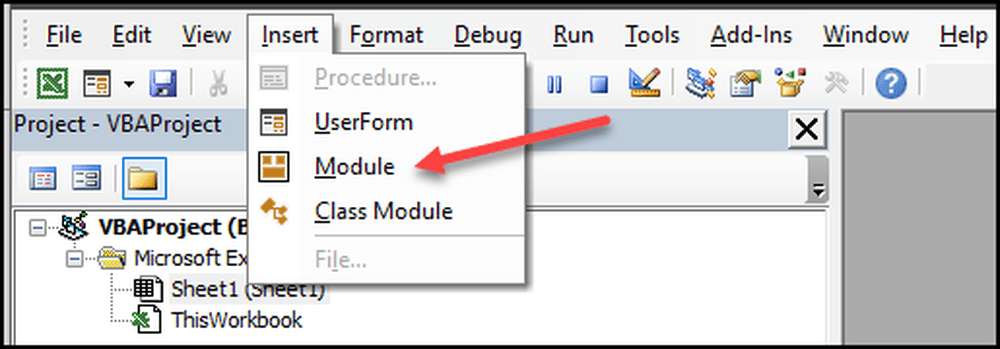
- Hold down the ALT + F11 key to open the Visual Basic application.
- Click on Insert and then select Module:
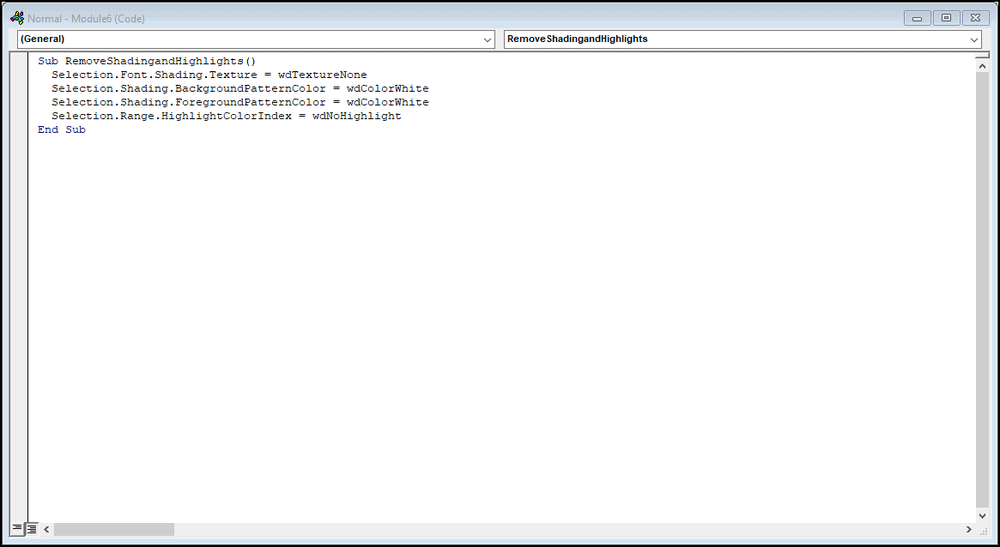
- Copy the following code in the window that pops up:
Sub RemoveShadingandHighlights()

  Selection.Font.Shading.Texture = wdTextureNone

  Selection.Shading.BackgroundPatternColor = wdColorWhite

  Selection.Shading.ForegroundPatternColor = wdColorWhite

  Selection.Range.HighlightColorIndex = wdNoHighlight

End Sub- This is how it should look:
- Press F5 to run the code. This will immediately remove the highlighting from the selected text. It really is as simple as that.
In Summary
I’ve gone through how to remove highlights in word as well as show you the difference between shading and highlighting. It’s important to note that the best thing to do whenever you are copying and pasting to word is to either use the merge formatting or the keep text only options. This will save you a lot of heartache later on in the piece. I hope you have found this post helpful. As always, if you have any questions or comments, please leave them in the comments section below. Good luck!
